4 Easy Embossing Techniques for Makers
Most of us think that embossing entails rubbings (like you do on a Church floor) or using a machine such as a Cuttlebug or Sizzix. Embossing is both of those and much more. There are many embossing techniques you can use and some will require equipment but others are finding the right tool for the job. Even a safety pin (a large or medium one) will give you some amazing results.
Using Embossing Techniques
If you are making a handmade card such as the one in my blog post called “Handmade Birthday Card” or a “Handmade Bookmark” you will find that embossing can be used to make the project look even better. Plus you can download some of the templates from my resource library and use them for embossing as well.
Today, I am going to explain the 4 embossing techniques so you can decide which one works for any of your projects.
What are the 4 Embossing Techniques?
As I mentioned, there are some embossing techniques that are simple – often called dry embossing and others where you apply heat and or pressure. Depending on your craft supplies and equipment, only you can decide what will work best for you.
Embossing Technique Terminology
As with any craft niche, there is always a lot of terminology you will see flying around. To get you started, I am giving you a list of the terms so you won’t feel so lost when the explanations use some of the words.
- Cardstock – means using a heavier weight paper such as 65 or 80 lb, Embossing works best when you are using a cardstock medium weight or higher. Lighter papers will often tear not giving you the results you would prefer. You could use an old cereal box as your material. I found plain cardstock at my office supply store or you can purchase multicolors such as those sold by Reflections.
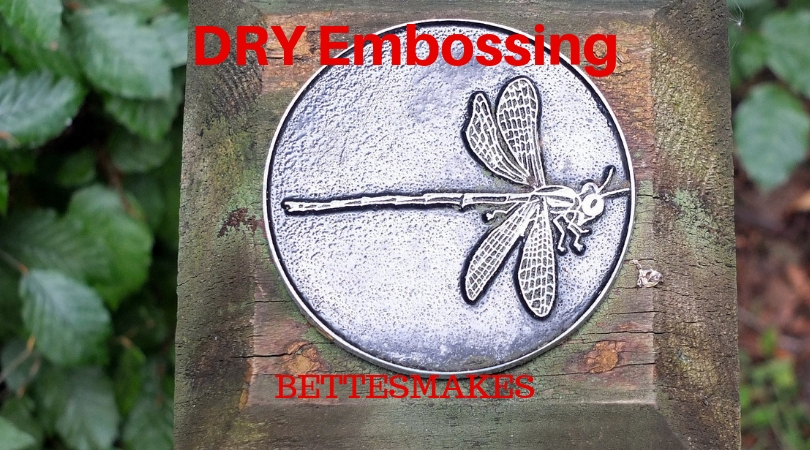
- Dry Embossing – this is an embossing technique where you are tracing a stencil. You will need a light source below you stencil so you can accurately trace it with a stylus (see below for the definition) or the blunt end of a safety pin. When I was in elementary school, we used to tape stencils to a window and use that as our light source. Today you can purchase light boards (these can be quite inexpensive) or make your own. BTW this type of embossing may be called relief embossing depending on what pattern you are using.
- Embossing Ink – these inks are specialty inks where they will puff up after you have used them on paper. I use Sakura Souffle but there are many others on the market. I like Sakura pens because they have a big variety of colors and the inks do not smear after they have dried. Inks are often used with the heat techniques as they are slower drying and you can adhere powders, etc. quite easily.
- Embossing Powder – these powders are created for the sole purpose of being able to “melt” them with a heat source (a heat gun). I found that the best powders were made by Ranger and I use a lot of the gold color. You would use a special stamping ink (slow drying) and sprinkle the powder over the ink, drain the loose powder (put it back in your jar) and then apply heat where the powder clings to the paper. These powders can be found in the dollar store although the quality may not be that great, they still work beautifully.
- Embossing Wax– this rub comes in small cans and once you have a dry embossed piece, you can apply the rub on the surface. I use Art Alchemy Opal Magic Wax, my favorite is Blue Velvet as it provides a shimmer effect to my projects.
- Heat Embossing using a Heat Gun – this means using a stamp with slow drying ink, applying the embossing powder, then pointing a heat gun at the powder to melt it into the paper. You can also use heat on a previously dry embossed item as well by simply apply a slow drying ink to the image, then the powder to make a special effect.
- Heat Gun – use a variable heat control one if you are able because you do not want full blast every time you use it. These are not expensive and worth having on hand. You buy a Mini Hot Air Gun that will do the trick.
- Light Board – this is a light source for tracing your stencils. I mentioned you could use a window or make your own but today the price has come down a great deal so purchasing a light board is not out of reach. The light board is simply providing you with backlighting for tracing.
- Pressure Sandwich – in order to dry emboss you will need a pressure sandwich which is a series of boards where the material and the embossing plate can be put in the center. This means when you apply pressure to this sandwich you will end up with an embossed object. If you own a Cuttlebug or Sizzix you already have your sandwich plates. If you do not, you can make your own. This is another lesson altogether but I did find an article that will help: “How to Emboss Without a Machine“.
- Stencil – anything you want to use for embossing. You can purchase embossing folders (these can be very cheap and Darice has a huge variety available), with designs already in place or find anything with a raised surface in a pattern you want to reproduce. If you are truly ambitious you can also make your own stencils. I have done this with cutting out 4 layers of the same design.
- Stylus – a stylus is simply a pen-like instrument that will leave a scoring mark on your paper (the grooves for your embossing). You can buy a set for under $10
Now that you have a grasp of all the terminology, it is time to move on to the 4 embossing techniques you can use!
Dry Embossing Technique
To use the dry embossing technique you will need to have a light board or light source, tape to hold down your stencil and your cardstock being used for the tracing, wax paper and a stylus.
Step 1 – Rub the cardstock (65 or 80 lb.) with the wax paper. This will allow the stylus to more easily move over the surface when tracing the stencil.
Step 2 – Secure the stencil over the light board or light source using tape.
Step 3 – Secure your cardstock over the stencil making sure you can see the stencil outline below. Place your cardstock in the position you wish for the final outcome then tape it securely in place.
Step 4 – Using the stylus (you can use the rounded end of a safety pin if you do not have a stylus) and trace around the edges of your stencil. Press firmly but not too hard so that you make an impression in the cardstock.
Step 5 – Once you have finished tracing, remove the cardstock from the stencil. You should have the design embossed into the page.
Step 6 – Add embossing powders, ink or wax to make your design stand out.
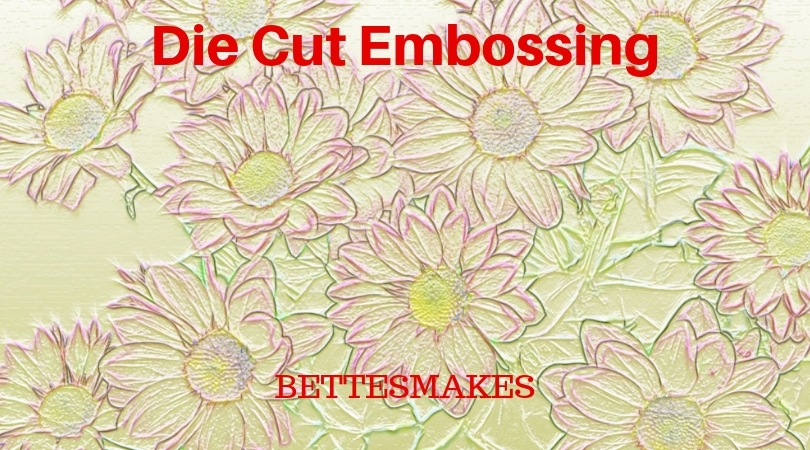
Die Cut Embossing Technique
For this embossing technique you should use a Cuttlebug or Sizzix machine although you can create your own sandwiches and pressure plates. I have heard of someone using their pasta machine as a die cutting machine – I guess it works but I must admit I have never tried it.
Step 1 – Assemble your plates for your die cutting machine in the order and type according to the manufacturer’s specifications.
Step 2 – Insert your cardstock inside the embossing folder placing it so that the design will be on the side of the paper you choose.
Step 3 – Roll the sandwich through the machine. You may want to roll it back and forth a couple of times to get a real clean image. BTW I have used many different stencils here not just folders and they all work incredibly well.
Step 4 – Remove the sandwich and the embossing folder and cardstock.
Step 5 – Decorate as you wish with embossing powder, wax, or ink. Or simply leave it as is.
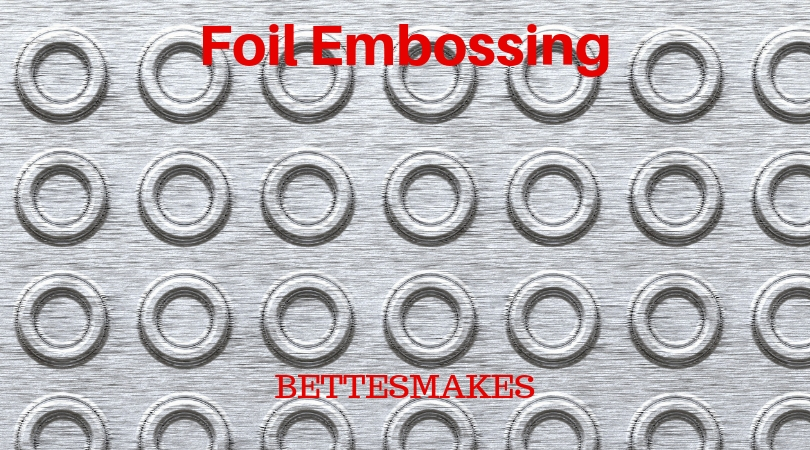
Foil Embossing Technique
Foil embossing can be done with foiled cardstock or you can use foil from your kitchen. If you use kitchen foil you will need to make sure the foil is attached to the cardstock. I have used Elmer’s glue for this just to make sure the foil doesn’t move.
Step 1 – Adhere the foil to the cardstock unless you are using pre-made foiled cardstock.
Step 2 – Create your plate sandwich using an embossing folder or die for your project. Yes, you can cut then emboss any foiled cardstock. Use your imagination for what you want to make.
Step 3 – Run the sandwich through the cutting machine.
Step 4 – Remove the plates and then the cardstock. You should have a beautiful design completed.
Step 5 – Add your new embossed foil piece to your project.
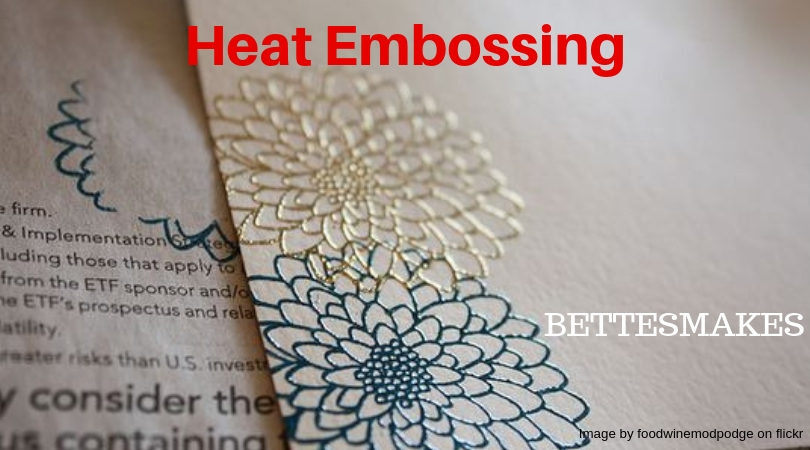
Heat Embossing Technique
Last but not least is the heat embossing technique. For this technique, you are going to need some equipment, especially a varied temperature control heat gun. Other materials you will need include a stamp, a stamp backing for applying the stamp, slow drying or embossing ink, and some embossing powder.
Step 1 – Stamp the cardstock using the stamp design you wish with a slow drying ink.
Step 2 – Sprinkle the embossing powder all over the stamped portion of the cardstock then tap off the excess and put it back into your powder jar.
Step 3 – Apply heat from your heating gun so it melts the powder. Do not get your surface too hot because the powder may shrivel up (yes, this has happened to me) and ruin the embossing project.
Step 4 – Add more designs or sit back and admire your beautiful work.
More Reading on Embossing Techniques
Although I have given you a good groundwork on embossing, there is still a lot more you can learn. I found these books as excellent resources
Cards That Wow with Sizzix: Techniques and Ideas for Using Die-Cutting and Embossing Machines – Creative Ways to Cut, Fold, and Embellish Your Handmade Greeting Cards (A Cut Above)
Crazy For Chipboard: How to Cover Chipboard with Paper, Paint, Distress, Gloss, Emboss, Crackle, Dye, Gold Leaf and Textures by Donna Goss (2006-01-01)
Metal Impressions; Emboss, Impress, Punch, Shape & More by Suzanne McNeill
Need Visuals for Embossing Techniques?
What is a blog post without introducing some great artists and how they use embossing techniques to create incredible works of art.
Creative Uses of Embossing Folders
Everything You Need to Know to Start Heat Embossing with Embossing Powder Uses, Beginners Guide
Use Kitchen Foil with Embossing Folders for Cardmaking
Last Word on Embossing Techniques
When I first got my Sizzix machine, I was embossing everything, no matter what came my way! Now I have settled down a bit and use embossing techniques with a little more thought on the overall design of my project. I love using powders, inks, and waxes as they give a beautiful finish to cards and more.
Have you tried embossing yet? I am going to suggest you get started even if you don’t have the equipment – watch the second video on how to emboss using folders. It is a lot of fun and the whole family can participate.
Don’t forget to go to my resource library and use some of the downloadables there. I am putting new ones up each week as I complete more projects!
Until tomorrow…
Bette
PS the password for the resource library is love
Please pin this image to your Pinterest account. I truly appreciate any sharing you can do. Many thanks and Happy Crafting!