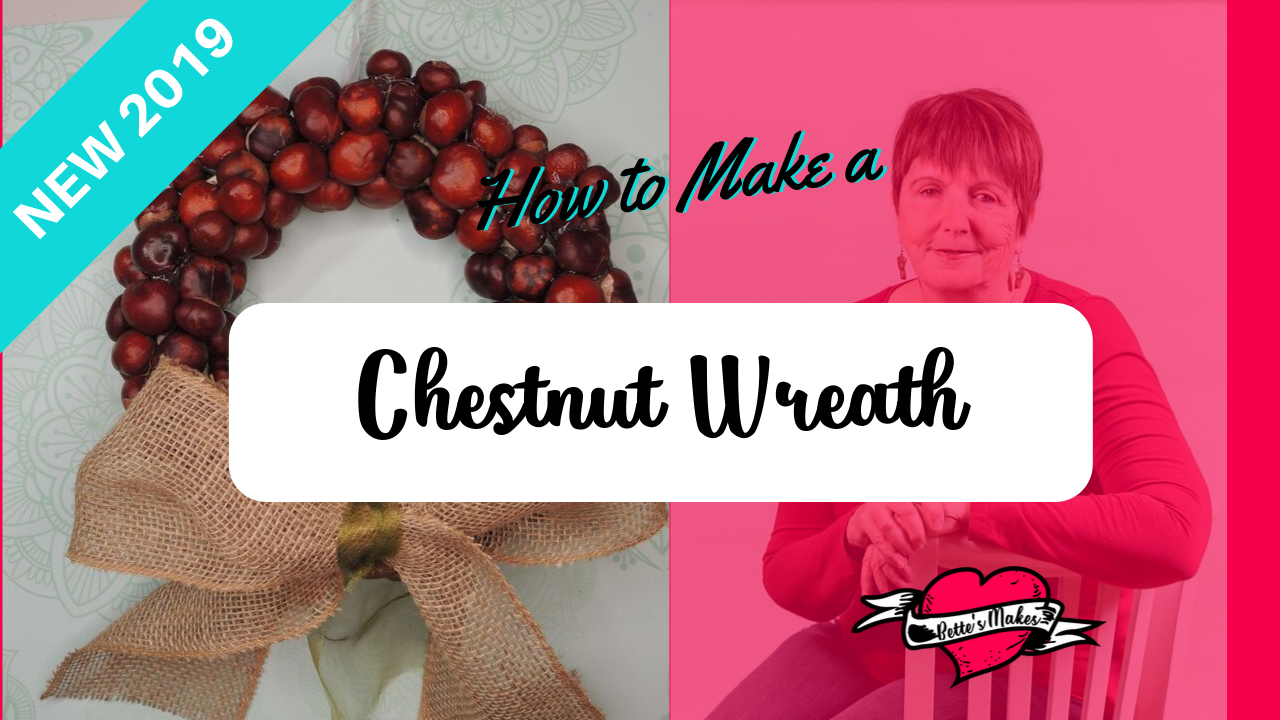

Chestnut Wreaths Take You Back to Nature
Chest wreaths are perfect for those of us who love nature and love to use natural materials in our projects! I was walking through our local park when I saw all the chestnuts on the ground and remembered collecting them when I was quite young. We used to fill bags full and play games with them - wow such great memories!
Today, I was thinking about how I could use them in a craft without it breaking the budget. My friend Barbara came up with some ideas and sent me a link on what was possible. There were some really cute stick people, which I loved!
I finally settled on making a Chestnut Wreath and as with any new project I was on the hunt for the materials I would need to use!
A trip to the dollar store always makes my crafting budget easy to maintain - so I bought a wicker wreath round (or two), some wide ribbon, and sode wide burlap strips - you can check these out in my video (see below).
Now, on to making this incredible Chestnut Wreath!
Quick Links to Information in this Post
Here’s what you need to make your own Chestnut Wreath. This post does contain some affiliate links for your convenience (which means if you make a purchase after clicking a link I will earn a small commission but it won’t cost you a penny more)! Read my full disclosure policy.
Chestnut Wreath Materials
Chestnut Wreath Step-by-Step Directions
Step 1
Gather all you materials together, plug in your hot glue gun to make sure it is heated before starting the project.

Step 2
Wash and dry all of your chestnuts. This is important for ensuring that any dirt is gone (it does interfere with how well the glue will work).
Step 3
Tie the top ribbon in place (if your wreath form does not already have one).
Step 4
Apply globs of hot glue to one chestnut (preferably on the flat side) and press it into the wreath form. Hold it in place for a few seconds to make sure it will stay in place.
You will be adding chestnuts to the top and sides of the wreath form and leave the backside plain. This way the wreath will hand easily and you will not risk the wreath falling apart.
Repeat the process for each chestnut (only do 1 at a time) until you have the entire wreath covered with chestnuts.


Step 5
Let the glue dry before adding the bow.
To add the bow, take your burlap strip or wide ribbon and make a large bow.
To fasten the bow to the wreath, take a long strip of ribbon and tie it around the center of the bow, then take the ribbon ends and tie it around the bottom (or top) of the wreath.

Step 6
Hang your new chestnut wreath and take lots of photos!
I do hope you enjoyed making this simple project from nature - this wreath is so incredibly beautiful and looks very complicated to make. Only you and I know that it is quite a simple process!
Chestnut Wreath Video
Last Word
Chestnut Wreaths are fun to make, just don't burn your fingers on the hot glue ike I did. I am sure I got at least 4 of my finger tips with that hot sticky stuff! At least they sure hurt today.
I tried my ways to glue the chestnuts to the wreath form and found that applying large gobs of glue on the chestnut and the pressing the chestnut onto the wreath worked the best,. So far my wreath is completely intact!
The ribbon at the top needs to be very secure as it will be holding the wreath in place on a door or wall. Do some testing before you let your wreath hang. Also, the bow can be done in many ways, I just used one method for my bow and I did not add any other embellishments.this is certainly something you may want to do.
I would love it if you shared your chestnut wreath project on our facebook group!
Until next time...
Happy Crafting!


Please join me on Pinterest:https://Pinterest.ca/BettesMakes
Join my Facebook group: https://facebook.com/BettesMakes
Follow me on instagram:https://Instagram.com/BettesMakes
Subscribe to my YouTube Channel: https://www.youtube.com/channel/UCzMHoceK1XiXi8IykicnUmQ
Please share this pin on your favorite Pinterest board so you can access this information any time you wish.
