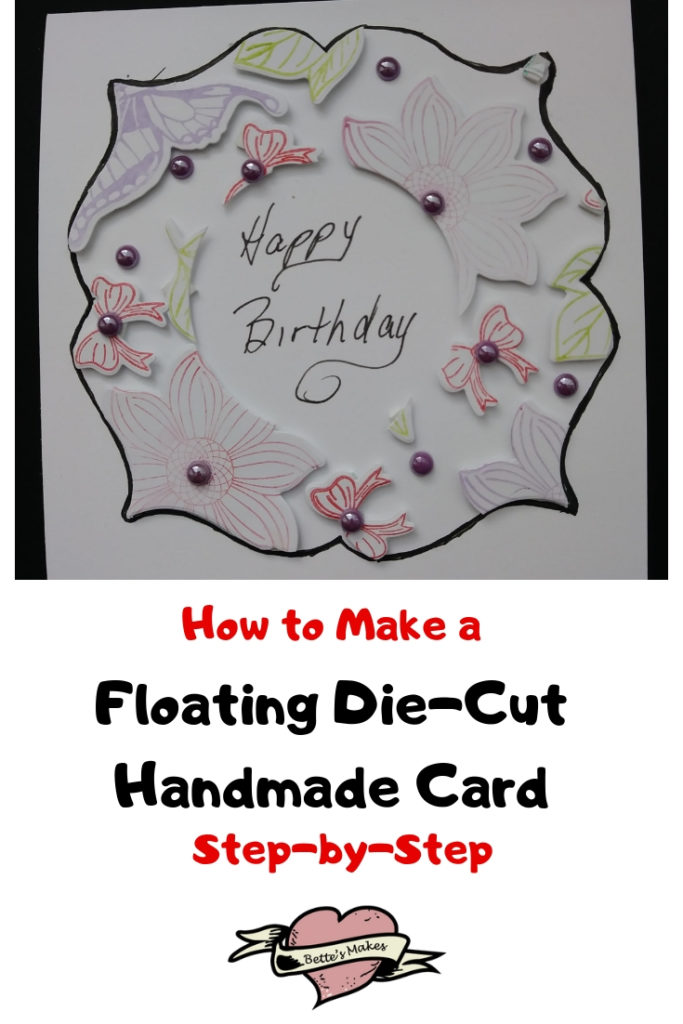
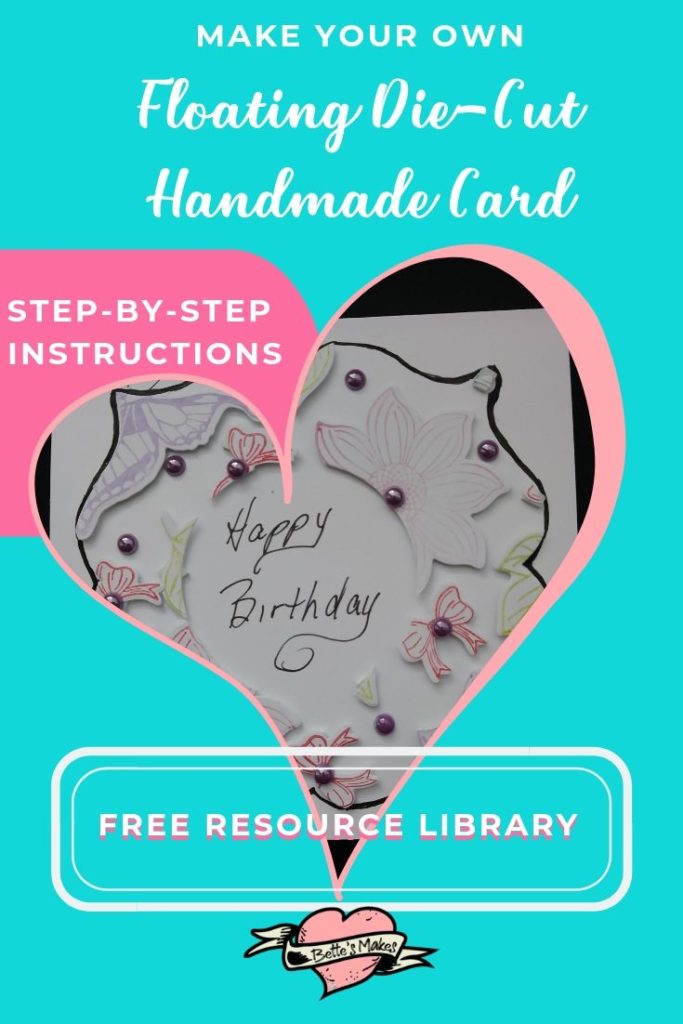
Master the Floating Die-Cut Technique
Floating Die-Cut handmade cards are nothing new and I have seen it featured in several articles as of late but I must be honest, I have never really tried it before. The technique sounds so very complicated, yet when broken down into small steps, it is actually very easy to make it work for any card project.
I find it so fascinating to see how many real ideas can make a difference in how a card comes to life. The floating die-cut technique is certainly something that is worth mastering.
Quick Links to Information in This Post
- Floating Die-Cut Handmade Card Materialss
- Floating Die-Cut Handmade Card Step-by-Step Guide
- Floating Die-Cut Fun Reading
- Floating Die-Cut Video Ideas
- Check my Resource Library for FREEbies
Here’s what you need to make your own Floating Die-Cut Handmade Card . This post does contain some affiliate links for your convenience (which means if you make a purchase after clicking a link I will earn a small commission but it won’t cost you a penny more)! Read my full disclosure policy.
Resource Library & More
Today we are going to explore floating die-cut handmade cards to make some beautiful designs. Yesterday I have added a flower guide for the flower pounding project to the resource library. You may also be interested in yesterday’s article on Handmade Cards using Flower Pounding.
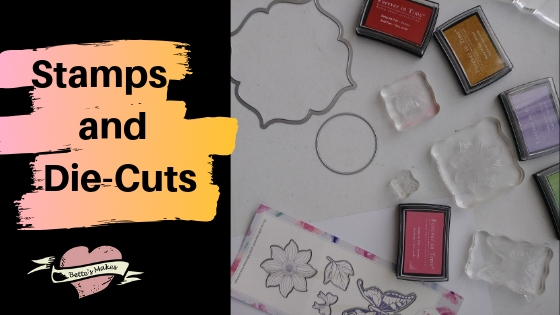
Floating Die-Cut Handmade Cards Materials
- Matching Dies and Stamps
- Stamp Pads with various colors
- Transfer Tape
- Die cutting machine (I use a Sizzix )
- 5″ x 5″ Folded Card (10″ x 5″ piece of cardstock)
- White Cardstock (for stamping the images)
- 3D Foam bits
- Scissors
- 5″ Square Die
- 2.5″ Circle Die (any circle size will do for the center0
Floating Die-Cut Handmade Card Step-by-Step Guide
Step 1 – Gather your floral stamps and die-cuts that match.
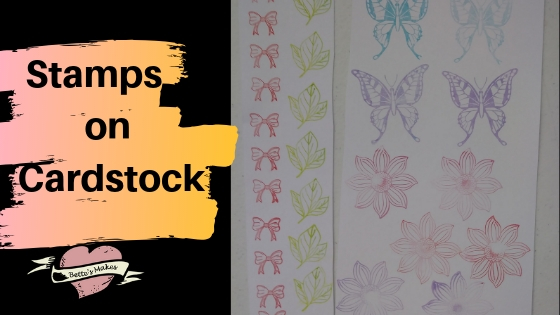
Step 2 – Stamp many florals onto white cardstock using various ink pads for color variations.
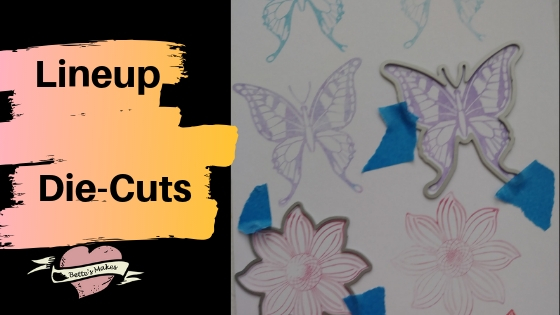
Step 3 – Line up your die-cuts over the images and secure in place with tape.
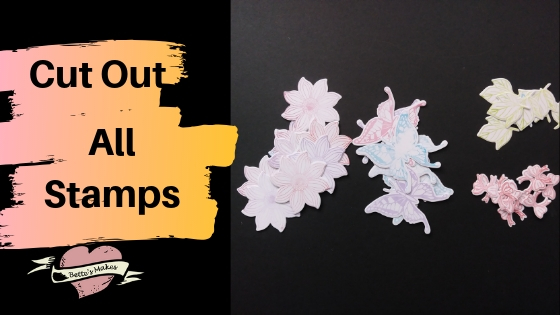
Step 4 – Cut out the prints with the dies (you may have to do this several times in order to have enough florals and greens available for the next step.
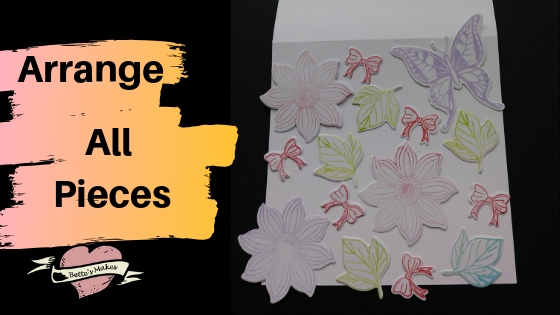
Step 5 – Arrange the die-cuts onto the 5″ square piece of cardstock. Make sure you leave space between them for effect.
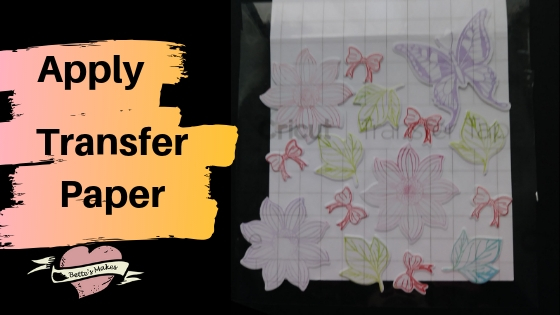
Step 6 – Using transfer paper, place the paper over the arrangement you have made and lift them up carefully.
Step 7 – Place the lifted sheet onto a cutting plate for your Sizzix or Cuttlebug and place die-cuts for a square and circle over the top of the sheet.
Step 8 – Run the sandwich through your cutting machine.
Step 9 – Turn the sheet over and place 3D foam pads over the surface (this will give the final card a 3D appearance).
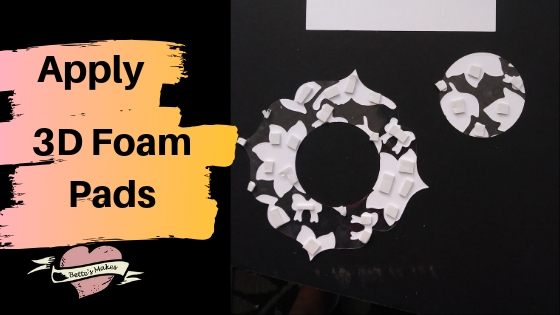
Step 10 – Gently lift the circle portion away and place it on a piece of cardstock – you can use this later for another card project. I decided to use the circle for the inside of my card.
Step 11 – Remove all the backing pieces from the small foam pads on the main section of the design.
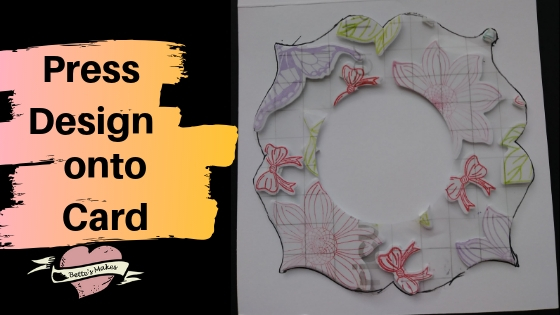
Step 12 – Press the design onto the card front and then remove the transfer paper.
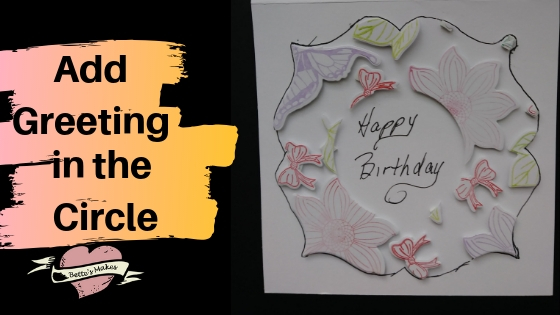
Step 13 – Die-cut the sentiment or hand write it for the card and place it in position.
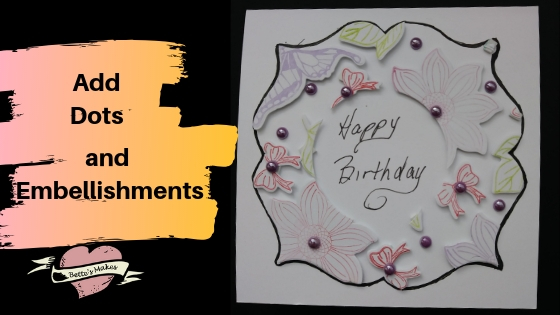
Step 14 – Add dots or sequins or other embellishments to the card.
Floating Die-Cut Fun Reading
- Cards That Wow with Sizzix: Techniques and Ideas for Using Die-Cutting and Embossing Machines – Creative Ways to Cut, Fold, and Embellish Your Handmade Greeting Cards (A Cut Above)
- Joy of Cardmaking, Collector’s Edition (Leisure Arts #4606) (Paper Crafts)
- Cardmaking Stamping & Papercraft
Floating Die-Cut Video Ideas
Floating Die Cut Frame

Floating Die Cut Panel Cards
Floating Inlaid Embossed Die Cuts with Catherine Pooler
Last Word
When I first read about this project I thought it to be a bit confusing. I had to read the directions a few times before truly understood what the instructor was doing. In this post, I made the directions much simpler to follow using a one thing to do per step approach. I do hope you enjoy this way of making handmade cards using the floating die-cut technique.
Resource Library reminder. Even though we do not have a download for today’s project, there are plenty of FREE files there just for the taking. Please visit and visit often as each week I add new files for you to use in any of your projects.
Did you make a floating die-cut handmade card? If so, please share it with me in the comments below or on my Facebook page.
Until tomorrow…
Bette
PS the password for the resource library is love
Please pin the following image to one of your Pinterest Boards. I appreciate all your help in giving others access to this post and to my resource library. Thanks again and Happy Crafting!