
A Saturday to Remember
Today I drove 50 miles to be with my daughter and her family. We had planned a day to dye wool with all 4 kids and here it was the day it was about to happen. It had been two months since the idea crossed my daughter’s mind and now it was really happening! I was so excited to finally get a chance to try yet another craft.

We did do a lot of prep work ahead of the day which entailed spinning of the wool and purchasing dyes (we used high-end food coloring), and vinegar. The rest was not difficult to put together. We decided to have each person choose their own dyes and dye one large string of wool.
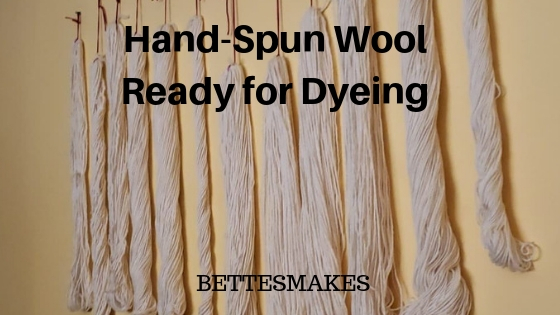
BTW Carina spent a whole week spinning just to have 12 skeins of undyed wool all ready to go. See her work below:
Materials we Used
- Hand Spun Wool
- High-End Food Coloring (used for fondants)
- Saran Wrap
- Vinegar
- Latex Gloves (who wants dyed hands anyway?)
- Water
- Old Yogurt Containers (for each color of dye)
- Pegs (for hanging the finished project before skeining)
- Dinner Plates
- Microwave Oven
Methods Used for Dyeing
For our project today we used 4 different methods of dyeing but we will only talk about one of them in this article. We will discuss the other methods in another article during the week.
- Hand-Painted
- Dipping
- Kettle
- Steam Dyeing
All of these methods have a different way of dealing with the dye and handling the wool.
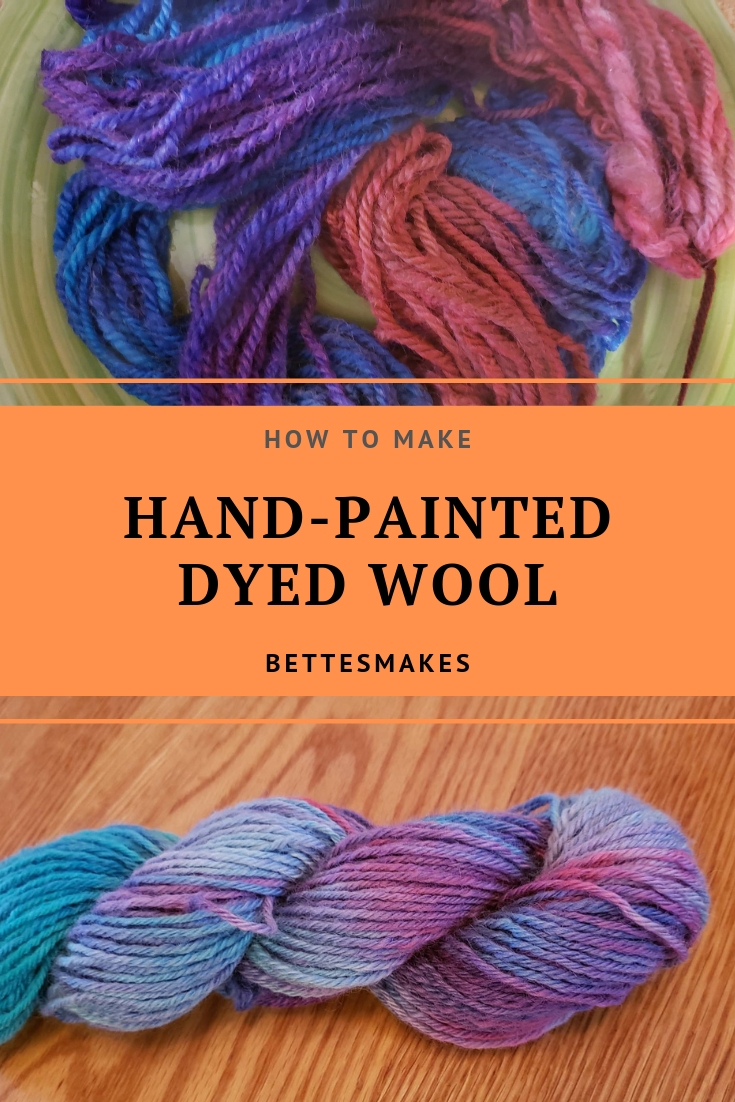
The Process – Hand-Painted Dyeing
As we were using hand-spun wool and not purchased wool we had to treat our wool with respect. Not that we would not with purchased undyed wool. We were also hand-painting the dye into the wool.
Step 1 – G
Step 2 – Prepare the painting area with saran or plastic wrap. The idea here is to have an area for painting and also to be able to wrap the painted wool into the wrap at the end of the painting process.

Step 3 – Prepare the dyes for the painting. Put half a cup of warm water into one of the yogurt containers along with a tablespoon of vinegar then add a half teaspoon of the concentrated food coloring to the container. Mix thoroughly so that there is no residue and everything is well mixed.

Step 4 – When the 10 minutes is up, gently squeeze the water from the wool, do not wring it as the wool needs to relax.
Step 5 – Place the
Step 6 – Start painting with your mixed dyes. For our project, each of us mixed 3 colors to use. This way overlapping colors would blend well together. As you are painting be sure to push the color into the wool by gently pressing down (this ensures that there is no white left and all the wool is colored).

Step 7 – Roll up the painted wool in the saran wrap and place on a dinner plate (or plate that can go into the microwave oven).
Step 8 – Place the wool and the plate into the microwave oven on high for 2 minutes, then remove and let cool for 10 minutes. When cooled, place it back in the microwave for 2 more minutes.
Step 9 – Let the wool cool enough to remove the saran wrap then set it aside to cool completely. This usually takes about 10 minutes.

Step 10 – Fill a bowl with soapy water and submerge the cooled wool. Gently push it up and down to “wash” it. After washing, drain the water and rinse the wool in the bowl without having the water flow directly onto the wool. This is important as you don’t want any heavy agitation because the wool will felt. When the soap is out of the wool and the water runs clear, gently squeeze (do not wring the wool) as much water out of the wool as you can. We squeezed our wool then used a salad spinner to remove more of the excess moisture.

Step 11 – Hang the wool to dry. This could take 24 to 48 hours to be completely dried and ready to skein up and use for your project.
Last Word
This was such a FUN Day with the whole family and this is just one of the dyeing methods we used today. I will add the other methods in the next week or so. Everyone participated even my 18 year old grandson! His color choices amazed me and his ability to help everyone was incredible. I just love family projects such as this one!
I do hope you can follow our steps and do some hand-painted dyeing with your family. The food coloring is non-toxic and edible as it is the kind you add to fondant when making cakes!
Until tomorrow…
Bette
PS – no downloadable today but the password for the resource library is love