Tuesday Tip: Designing Your Own Envelope and Card Corners
")
Making Corners is Easy with Slice
What I find interesting is the fact that most of us like to design our own things without having to purchase templates or spend time looking for something that is similar to what we want. Today's tip is all about making those slanted corners so you can make any size or shape and have flaps that are adjustable the way you want them to be.
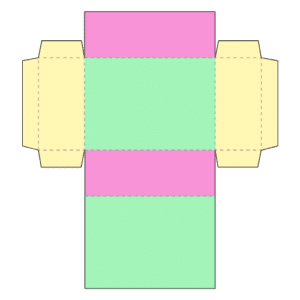
Step 1: Prepare Your Project
Put some Rectangles together so they look like the envelope above.
Step 2: Slice up a Triangle
Use a Triangle shape and size it up then cut off the top to make your flap. To do this, you can add a square to the Canvas, then cover up the parts you want to remove.


Step 3:. Make copies
Copy your sliced triangle and place and size them to fit on the area where you want a flap
Step 5: Adjust the Flaps
Make sure you adjust your flaps to fit onto the card or envelope.

Get Your Annual Pass to the Creative Crafters Club
Step 6: Weld it all together
Now that everything is in place, time to select it all and weld it into place. Now you have your flaps designed, just the way you want them.

Make sure you join our Facebook Group so you can ask any questions!
Be sure to watch the video for this tip inside the group. You will find it pinned to our Guides.
1 Response to "Cricut Craft with me: Creating Flaps and Corners for Cards and Envelopes"
Your tips are so helpful. Thank you!