Everything You Need to Know About Curves and Kerning!
I have been asked a lot of questions about curving text lately and whether the kerning feature has any effect on the curves.
Most of you seem to love the curve feature but also find it frustrating at the same time. With the introduction of kerned fonts in Design Space, you would think that curving would be a lot easier. Nothing could be further from the truth.
You will lose all your kerning when curving your text and here is why. Curving actually takes the font apart and moves the letters apart at the top of the font or the bottom depending on the type of curve you have opted to use.
The difference is that you can take the curve off and you will still have a kerned font.
What is a kerned font?
A kerned font is one that is spaced in a way that it is easy to read and looks better proportioned. When using a font that is not kerned, your letter spacing will look a little off.
The best way to curve a font
The curing in Design Space is based on a circle and not a circle so it is a good place to start! Yes, that is right, a good place to start.
Start by curving your text (in any direction) and then ungroup your text.
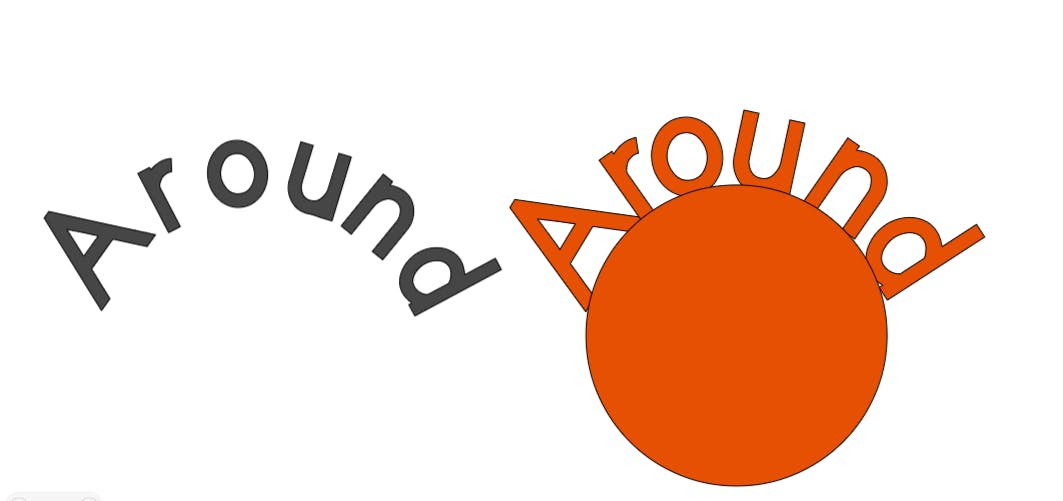
Once your text is ungrouped, you can adjust the kerning on your own. I usually add a circle from the shapes and place it inside the text so I can get a better visual on the moves I am going to make.
Here is an example of the word Around using a kerned font for the curve. The black image is the original, the orange one was ungrouped and moved around the circle so that the text is better spaced.

Here is my Step-by-step
- Type in the word(s) you want to use.
- Change the font as desired (use a kerned font if you wish)
- Use the Curved command to curve your text
- Add a circle underneath the word(s) so you can visually see where the letters will go
- Move the letters into place by adjusting the rotation, and or location
- Delete the circle if you do not want to keep it
- Select all the letters (remember they are ungrouped right now) then group them and weld them together.
I hope this gives you some insight in working with curves and kerning.
Until Next Time...

Learn more with weekly training as a quarterly member of the Crafters Club hosted by BettesMakes!
Do you own the Ultimate Cricut Toolkit? Did you know that there are 11 resources and tools in the kit to help you with your crafting journey? Buy it today.