Ready to start making a ton of stickers?

Start With Your Image
Most of the time a cute image crosses our path and it is something that would make a nice sticker! It would be perfect if you could just set it up to print then cut without any other steps, that is often not the case. If you want to make those perfect stickers, then just follow these simple steps:
You can watch the video in our Facebook Group: Https:facebook.com/groups/BettesMakes
Step 1: Start a New Project
Upload any image you want for your stickers, the one I am using is from Creative Fabrica and I am also using one that is part the Cricut FREE files inside of Design Space.
Step 2: Let's Start with the FREE image
Click on Images on the left=hand side bar. Under the Highlighted Categories, click on FREE.
This will bring up a list of FREE images you can use.
Find the "Film" one and add it to the Canvas
")
Step 3:. Duplicate and Contour
First before you do anything, make a duplicate of the image and set it aside (saves a lot of time not having to search for the original again if you need it).
Click on one of the images and select Contour, the Hide all Contours. Click away from the dialog box and you should see a solid shape.
This solid shape is what we need for the next step.
")
Step 4: Offset and Contour
With the solid shape selected, click on Offset. Change the Offset setting to 0.125 as this will work best for stickers.
When you make stickers, it is always best to have an area all around the outside that is white.
Click Apply and change the color of the Offset image to white.
We will now use Contour to put back the cut outs on the image.
With just the image solid shape selected, click on Contour and then Show All Contours. This will bring back the original image and you will also have a white background.
")
Get Your Annual Pass to the Creative Crafters Club
Step 5: Flatten
Select the Offset and the Image together and Align them Center. This way you know everything will look great.
Once everything is centered, make sure you have selected both pieces and then click on Flatten, The background and the image will now "merge" and be ready for making a sticker.
")
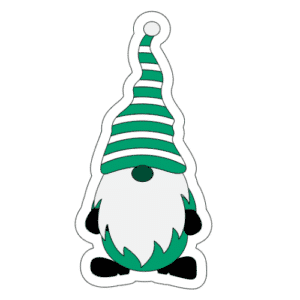
Step 6: Repeat for the Gnome Image
1. Add the Gnome to the Canvas
2. Add an Offset of 0.125"
3. Change the color of the Offset to White
4. Align the Offset and the Gnome (note there is no contour for this image)
5. Select both the Offset and the Gnome
6. Click on Flatten
Things to Consider
1. If you have an image with extra cut lines, you can use Contour, if that is not available, then using Offset is the best option.
2. Offsets make sure there is a little room between the cut and your image. This is a good thing as your cut will show the entire image without being trimmed.
3. Offsets and Flattening actually remove extra cut lines.
Make sure you join our Facebook Group so you can ask any questions!
5 replies to "Cricut Craft with me: Easy Way to Make Stickers"
I am looking to start mug press so I have ordered some transfer papper it will come on Saturday
Very helpful on how to make stickers. Do I need to use a special paper? Thank you.
yes, you will need sticker paper from either Cricut or Staples. You can print these on plain paper as well and then glue them onto your surface.
The link to the video does not take me to the facebook video. I’m getting a cricut advertisement. Am I doing something wrong?
When you go into the group, click on Guides, you will find the video there