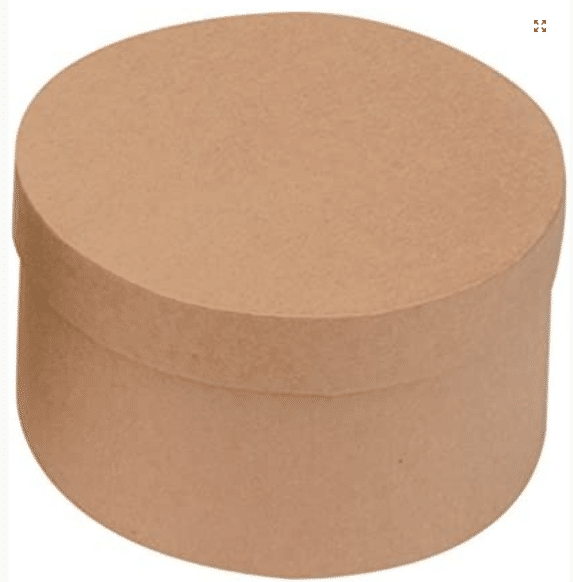
Round Edge Issues?

Have you ever been frustrated gluing the round edges on your projects??
I know I groan when it comes to gluing curves on a project. To me they never look truly finished and there are always little gaps here and there. I think you know what I mean. Even the best crafter has issues.
Here is are 2 methods that are an EASY trick you can use to add make gluing curves a lot simpler.
You can watch the video on YouTube:
Step 1: Download our template for this tip
Go to the resource library (https://free.creativecraftersclub.com) and download Asset #397 Round Box. We will use this template to practice gluing the curves. Once you upload the template and place it on the Canvas you will need to ungroup everything.
Step 2: Change Internal Lines to Score Lines
This template has 4 pieces, make sure you change the internal lines to score lines and Attach them to the basic piece as shown below:
")
Step 3:. Make It with Medium Cardstock.
Since these are small pieces, you will be able to use an 8.5 x 11 piece of cardstock or even use up some of your scraps. This is a test make for you to practice with.
Step 4: Fold the Score Lines
Fold each of the score lines so that you will have edges to work with.
BTW - I found a new glue to use that I absolutely love and recommend! It is called BEARLY glue.
Step 5: Glue Method number One
Take the smaller long strip and the large circle. You will be gluing the edges to the "inside" of the strip.
Start by adding glue to the first two small pieces and fit them to the circle. Make sure you hold the two pieces together so that the edges fit the curve of the circle.
Once the first two are glued, move on and glue the next two. When all the edges are glued to the circle, you can glue the strip together making sure the short piece is on the inside.
As you probably noticed, getting your hands inside the small box area was a bit difficult and making sure the edges matched was not that easy.
")
Get Your Annual Pass to the Creative Crafters Club
Step 6: Glue Method Number Two
To me, this next method is a lot easier for matching edges and the result is a lot cleaner.
This time you will be gluing the edges to the "outside of the Circle.
Start with the first two flaps and glue them to the circle so that they are on the outside rather than the inside. Make sure they are fit snuggly to the curve.
Continue with each flap all the way around and finally glue the edge together.
This method has a cleaner edge on the outside.
For this method you will need to cut an extra circle and glue it over the glued pieces for a really finished look.
")
Now that you have two ways to glue curves, pick the one that is the easiest for you. I know my choice is to glue on the outside!
Make sure you join our Facebook Group so you can ask any questions!
5 replies to "How to Glue Round Edges"
I can’t get my copy it won’t download
Here is the link: https://coloringbookbonanza.s3.us-west-2.amazonaws.com/Resources+Library/Round+Box.zip
Thank you Bette. This was very helpful.
Hi Is there a video that goes with this? I hit the link that says to watch it on the facebook page and all I get is the page to but the kit???
Here is the video link: https://youtu.be/gXEi4tTBj4Y