
A Friend is Having her Birthday
Today I am helping a friend (we used to run marathons together) celebrate her 89th birthday! Wow, it was only a short 30 years ago when I met her at the YMCA Marathon Clinic – she was one of the leaders of a group with lots of experience behind her, and I was just a long-distance running beginner! I never knew how old she was but I admired the fact that I, too, could still be running when I reached retirement some decades in the future. Birthdays are a time of celebration and accomplishment and my friend has many!
I decided that I wanted to make a handmade birthday card just for her. Something special and something she could relate to at a glance. I often find when going to buy a card, there is never the perfect one in sight! So on to finding a design that I know she would like.
You will find lots of great craft posts that you can make and add as a gift to any birthday card. Read this one called How To Make No-Sew Pillow Covers or perhaps a different kind of gift such as this one How to Make a Gorgeous Birdhouse. There are plenty more ideas on our blog.
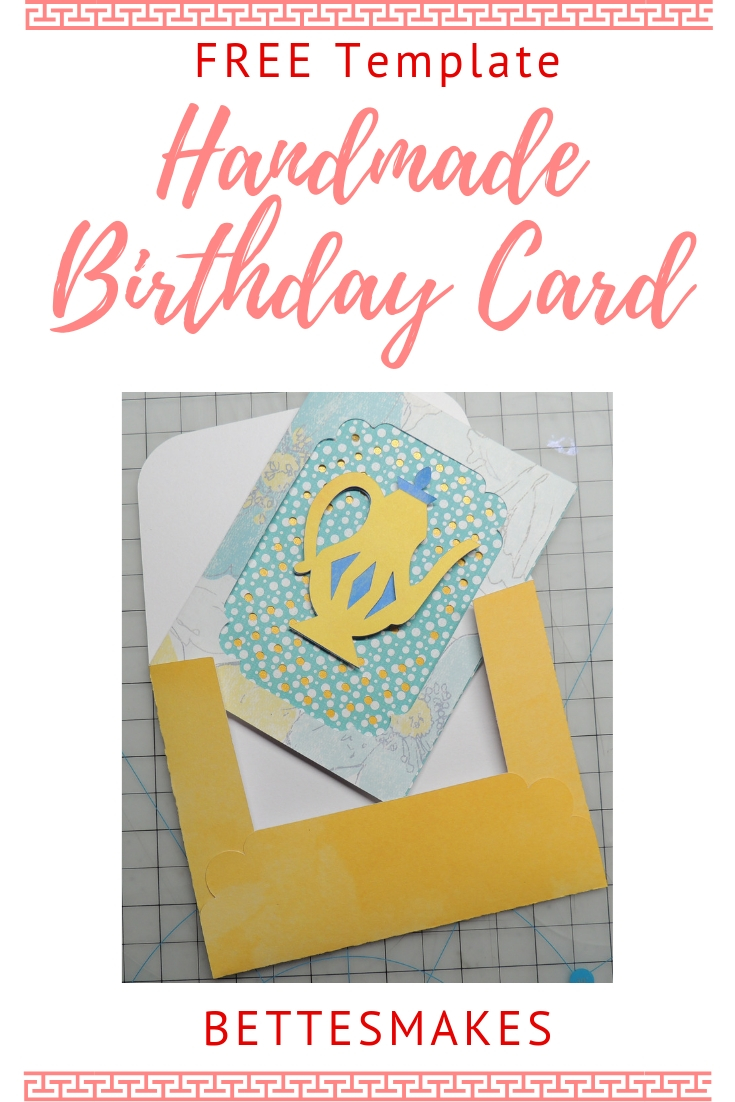
The Teapot Birthday Card
Today we are making a 3D teapot card which is fairly easy to put together. You will need to get the outlines from our resource library so you can make this card as well. If you prefer you can find the same project in Design Space by Cricut.
Materials For the Teapot Card
- Cardstock – one color for the envelope (and teapot front) and one color for the outside of the card.
- Patterned paper – a thicker paper weight works best but you can use any type of paper. You will need one sheet for the frame, one sheet for the teapot backing, one sheet for the background of the teapot.
- Scissors or cutting machine.
- Paper piercing instrument if you are cutting by hand. This is for the sheet where you will be cutting holes into the paper as a background for the teapot.
- Pen – to write the greeting.
- Glue – for this project I used glue dots as they are cleaner and easier to use than a wet glue.
- Foam pieces – with double-sided tackiness. This is for giving the teapot a 3D effect.
- Card outline downloaded from my resource library.
Making the Card
Making the card will be easy when you follow this step-by-step guide. Make sure you have all your materials assembled ahead of time. Let’s dive in and have some fun.
The card we are making is 4″ x 6″ so it is fairly small. Feel free to enlarge the project if you need something a bit bigger.
Step 1 – Download the project pieces from the resource library or head over to design space at the Cricut site and make your project there.

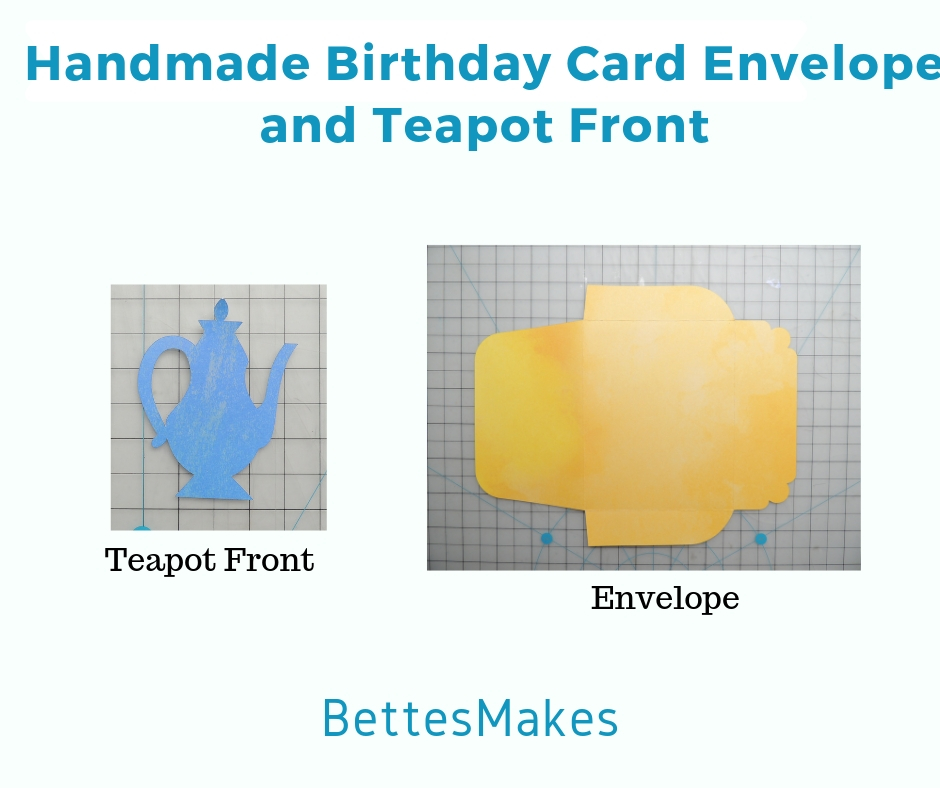
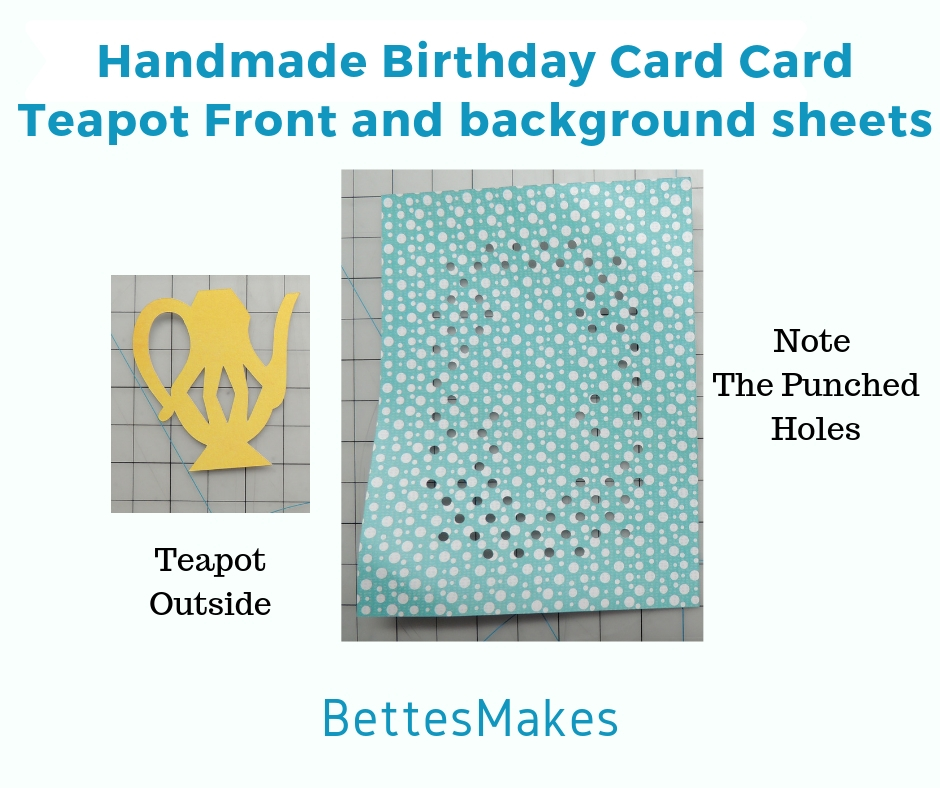
Step 2 – Cutting the envelope and teapot front. Think about what paper you want to use for the envelope and the front of the teapot. You will use the same color cardstock for both pieces. Cut out the envelope and teapot background piece.
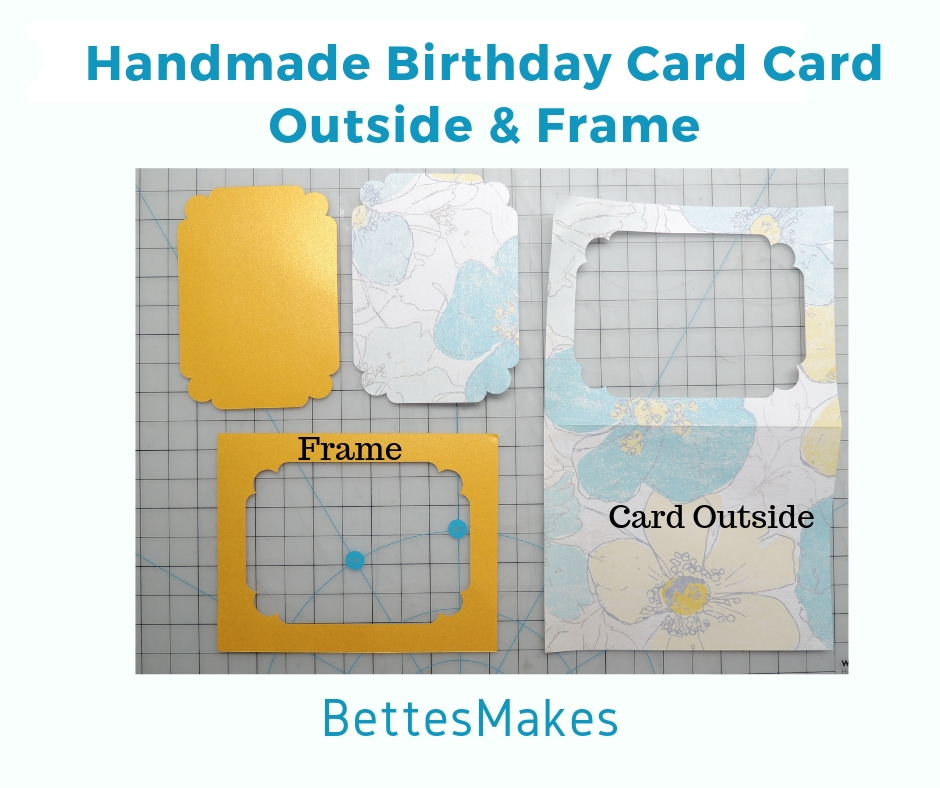
Step 3 – Cutting the card outside. Choose one of your sheets of paper to work as the outside of the card. I try to choose a color or design that will fit the color scheme without clashing. Cut the outside then the pattern from the inside. You will be using both pieces for the design so you may want to consider using an Xacto knife or equivalent to do the detailed work.
Step 4 – Cutting the frame. Choose a piece of paper that you will be able to see through the holes in the teapot background. We will be using all pieces of paper, so once again, use an Xacto knife if you are not using a cutting machine.
Step 5 – Cutting the teapot background piece. This piece of paper should be a contrasting color to the color of the teapot. This piece is a little more difficult to cut as the holes in the paper “surround” the teapot shape. You could use a small hole punch to make the holes if that is easier.
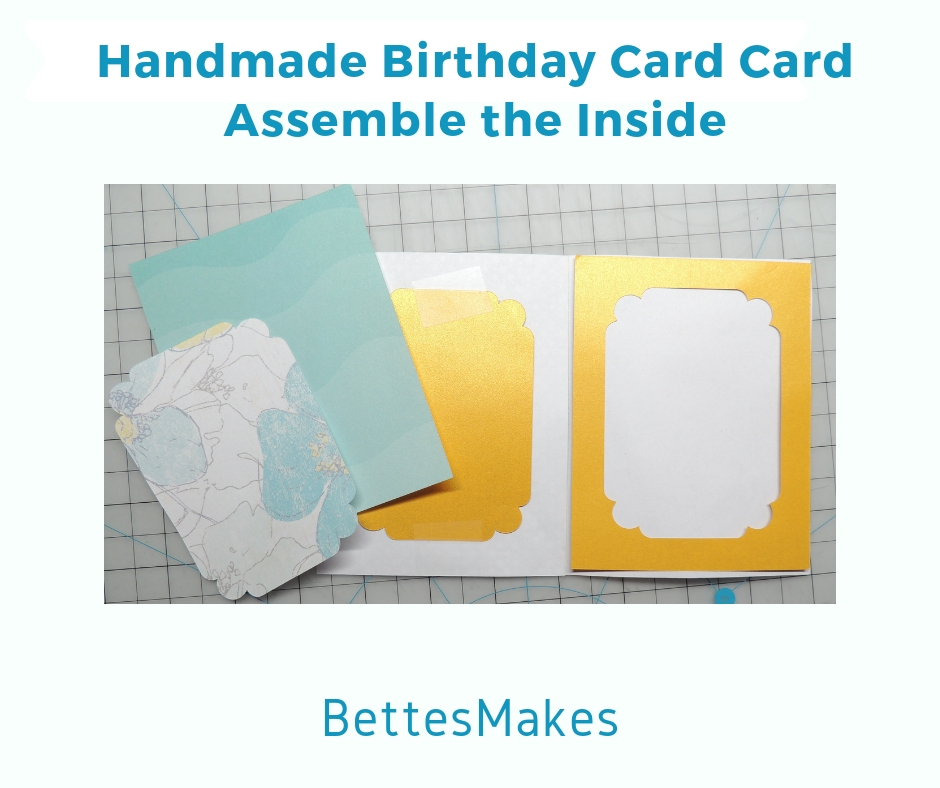
Step 6 – Cutting the Inside Sheet. This is the simplest piece to cut as it is a rectangle. It will be used to cover the inside back of the card.

As an aside – the outside of the card and burnish the fold to get a crisp fold before you start assembling the pieces.
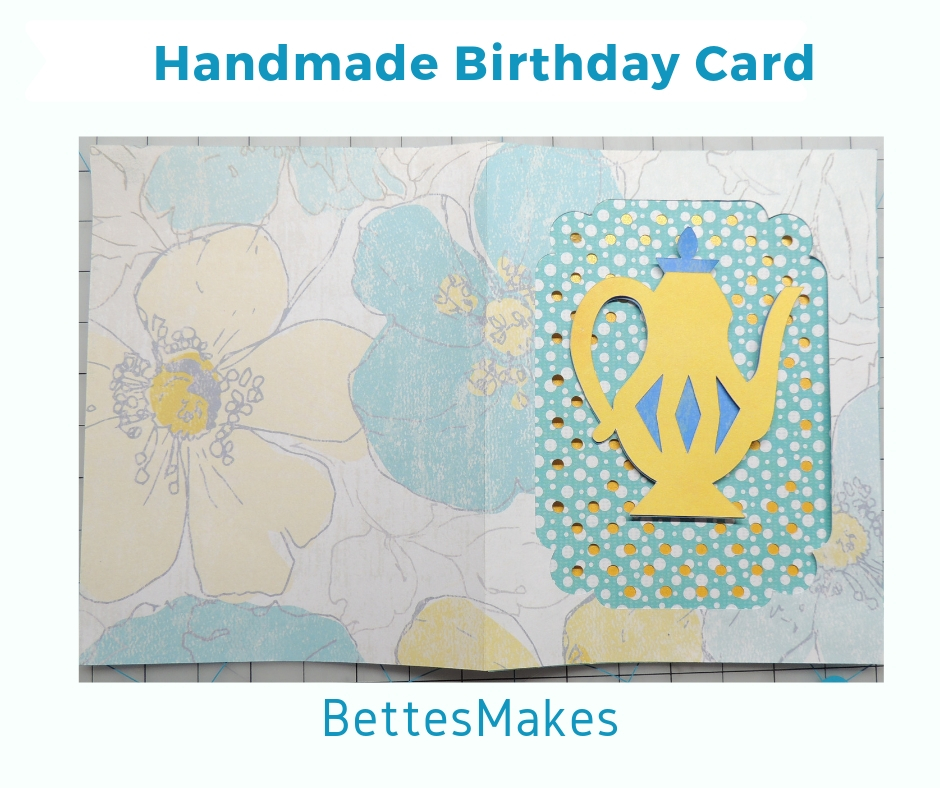
Step 7 – Assembling the front part of the card. Take the piece with the holes and affix it to the inside of the front of the card. You want the pattern to face front so you can see it through the cut piece of the card.
Next, glue the center part that was cut from the frame to the back of the piece with the holes. You want to have the color of this paper show through the holes.
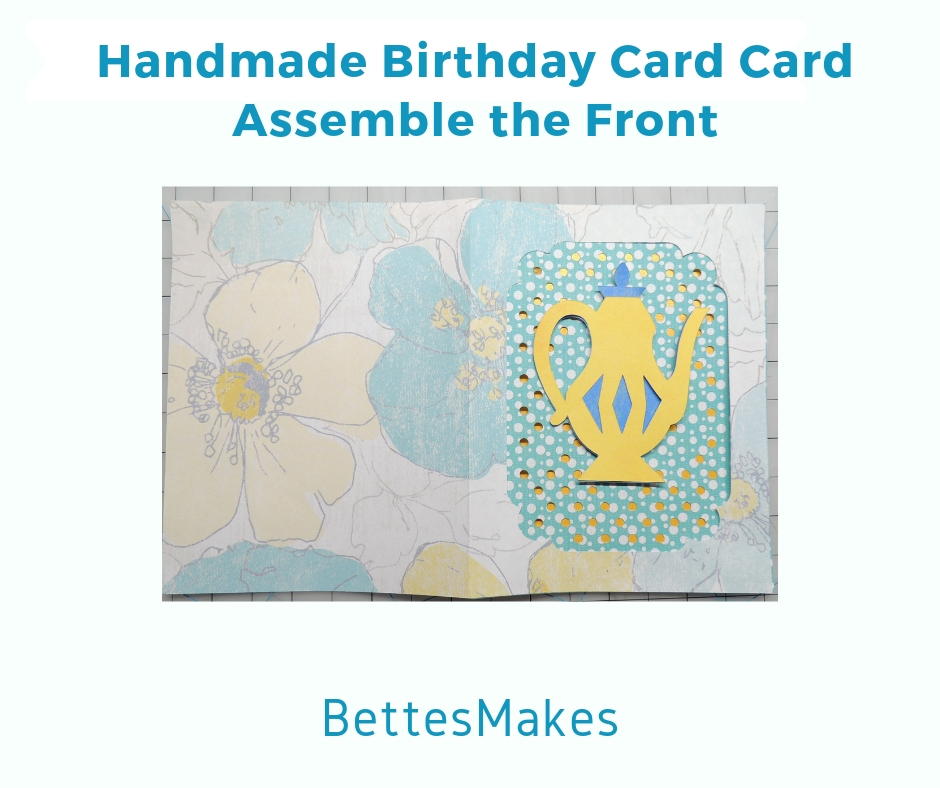
Step 8 – Assembling the Teapot. Use the foam pieces to glue the back part of the teapot into the center front of the card. This will give it a 3D effect. Next, glue the front of the teapot over top of the teapot shape you just put in place. The front of the card is now complete.
Step 9 – Glue the backing to the inside of the front. Have the pattern face the inside of the card. This piece will hide all the parts from the work on the front of the card. Next, center the piece you cut from the front of the card and glue it to the left-hand side of the inside.
Step 10 – Glue the frame to the right-hand side of the inside of the card. You will be writing your greeting inside the frame.
Step 11 – Putting the envelope together. Fold the envelope side flaps inward and burnish them to get a crisp fold. Do the same for the bottom flap. Glue the bottom flap on the left and right sides to the side flaps. Your envelope is now ready.
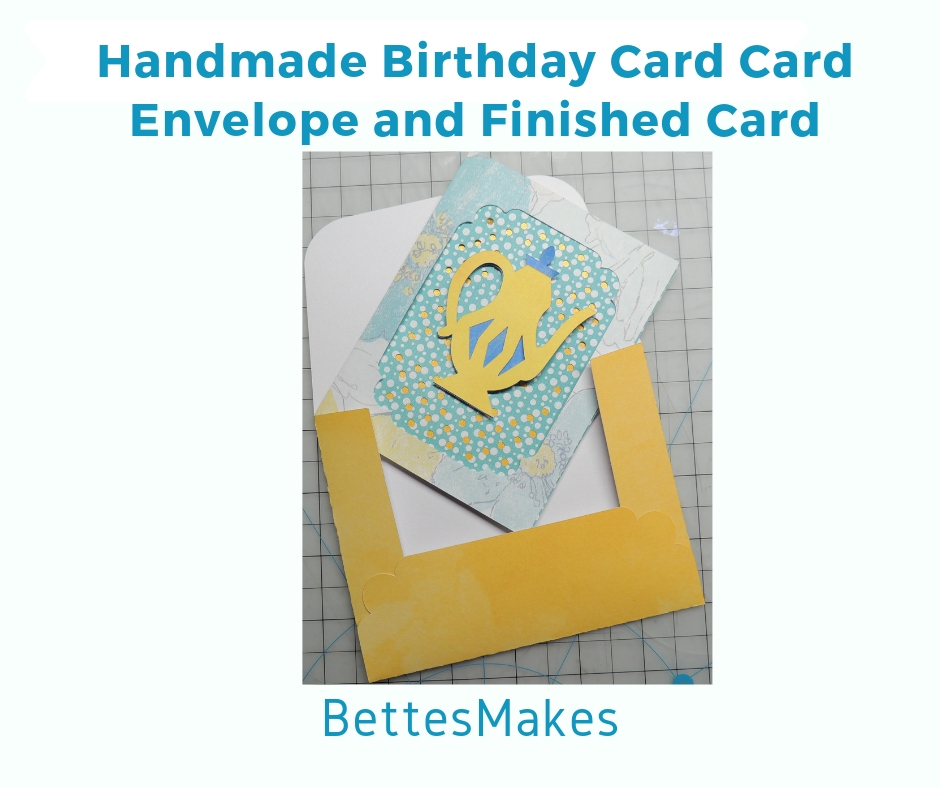
Step 12 – Your card and envelope are ready! Write your greeting on the inside, add a gift and take it to a friend!
More Reading and Ideas
I love books and I seem to collect a great deal of them when trying to perfect any craft or make. I found these three books I know you NEED to purchase to take card making to the next level.
The Complete Photo Guide to Cardmaking: More than 800 Large Color Photos
Pop-Up Cards: Step-by-step instructions for creating 30 handmade cards in stunning 3-D designs
Joy of Cardmaking, Collector’s Edition (Leisure Arts #4606) (Paper Crafts)
Need Visual Stimulation?
I found a couple of YouTube videos that were interesting and you may want to try some of these more difficult cards.
5 Card Making Hacks That Blew My Mind!
Creating an acetate window card || Cardmaking
how to make an interactive spinning card
Last Word
Making a card is a great way to spend an hour or two especially when the card has meaning and purpose. I loved making the teapot card and there is another special birthday coming up soon for my mother-in-law who will be turning 90 this year! Amazing! I can hardly wait to design something truly special for her!
Don’t forget about my resource library. Today’s card resources are located in that library along with many other downloadables. There is no cost for the library goodies, they are free for the taking.
Please share this blog post with your friends and others that love to make crafts, I would truly appreciate it! Many thanks ahead of time.
If you completed your card, please share it with me in the comments below or on my Facebook page. I would love to see your make!
Until tomorrow…
Bette
Would you pin this image on Pinterest for me – I really want to spread the word and your help will get me there – many thanks and Happy Crafting!!!
