Making a DIY Tote Bag > 1 Hour
For today I wanted to find a project that would take me under an hour to create. I also wanted something I would use and not just make and set aside. After some thought, I realized that I needed a new bag for taking snacks with me on walks. This is when I decided to design a small tote and work on it. The project only took me 30 minutes to complete, so I made more than one.
One of my challenges this year has been to do a new crafting project each day for 100 days. I have had no issues finding projects I have always wanted to try. Check out these latest articles on some very unusual crafts. All Occasion Ornaments and DIY Fonts. These were both amazingly fun to do!
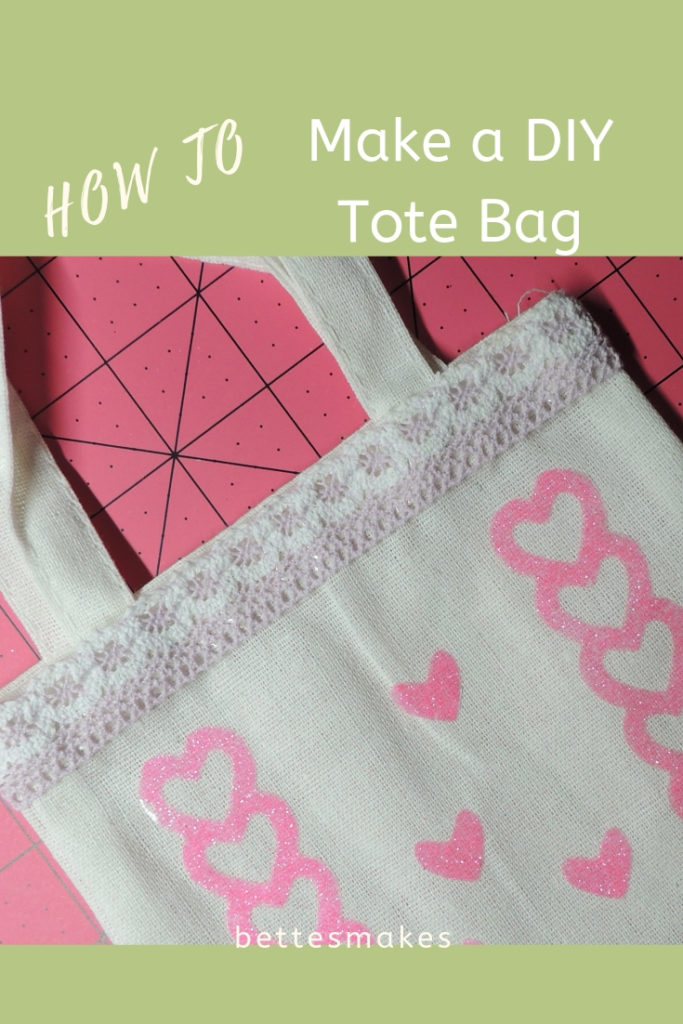
Today, we will make a small tote bag and decorate it with Washi Tape. I like using Washi tape for DIY Totes because I can change up the decoration to suit my apparel for the day. For this project, we will be making a small tote bag with a finished size of approximately 6″ x 6″. OF course, you can always increase the size according to your preferences.
What You Will Need
- Fabric – you will need a piece of fabric that measures around 16″ long and 12″ wide. This will be enough to make the body of the bag and the straps.
- Needle and Thread (or a sewing machine) – this project is small enough to sew by hand if you do not have access to a machine. I prefer to use a machine when I can.
- Thread – you can use the same color as the fabric or choose a contrasting color just for effect.
- Washi tape – this will be used for decoration. I used a lace fabric Washi tape for my upper trim and vinyl for the bag decoration. If you do not have any Washi tape you can use applique pieces or a cut out design of your own to decorate the tote.
- Ruler or Measuring tape.
- Pins – the straight kind to hold fabric together.
- Fabric marker – this will allow you to mark out the measurements for seams and folds before sewing the fabric.
- Iron – I always iron my projects along the way to make it easier.
- Scissors.
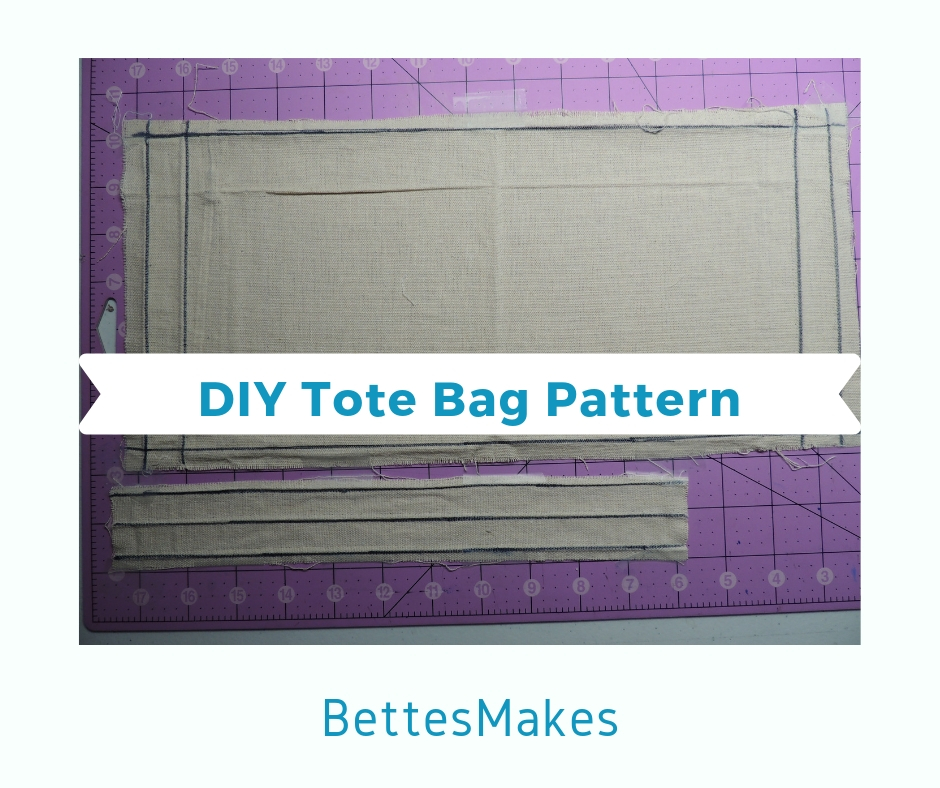
- Download the DIY Tote pattern from the resource library.
Step-by-Step Directions
Step 1 – Measure your material according to the pattern available for download in the resource library.
Step 2 – Cut the pieces of fabric.
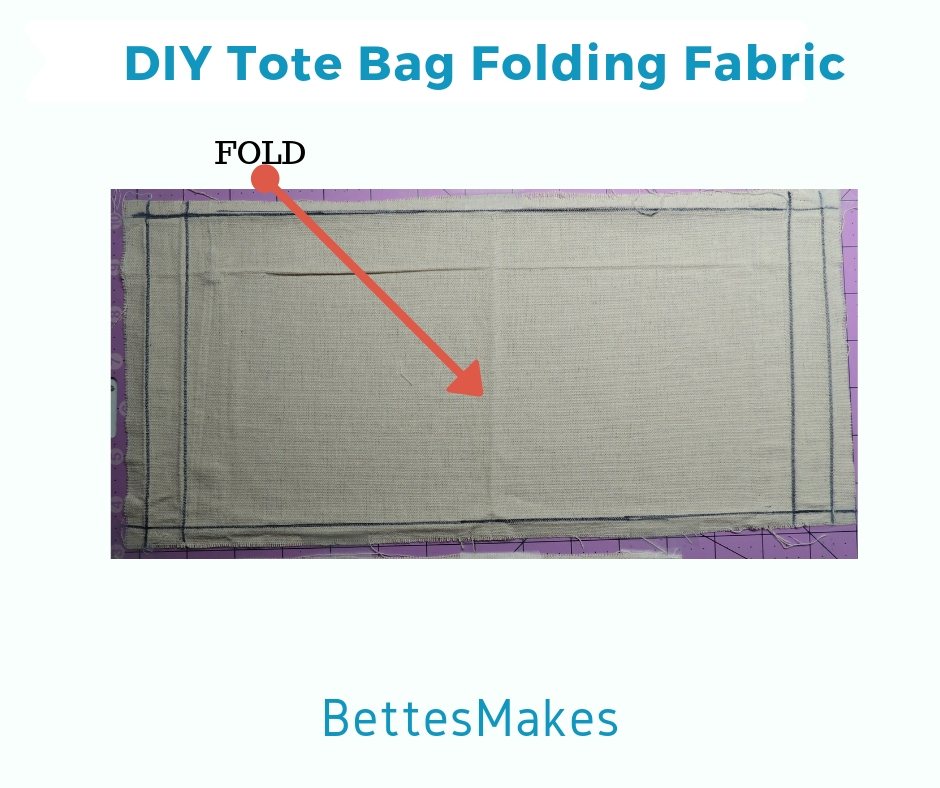
Step 3 – Use a fabric marker or pencil to draw the lines for the seams and folds onto the fabric. These marks will disappear when you sew the seams and wash the fabric later.
- Iron the edges to the inside of the strap (the pattern of the material will be exposed and the rough edges will be hidden.
- You will be making two lines of stitching on the handles.
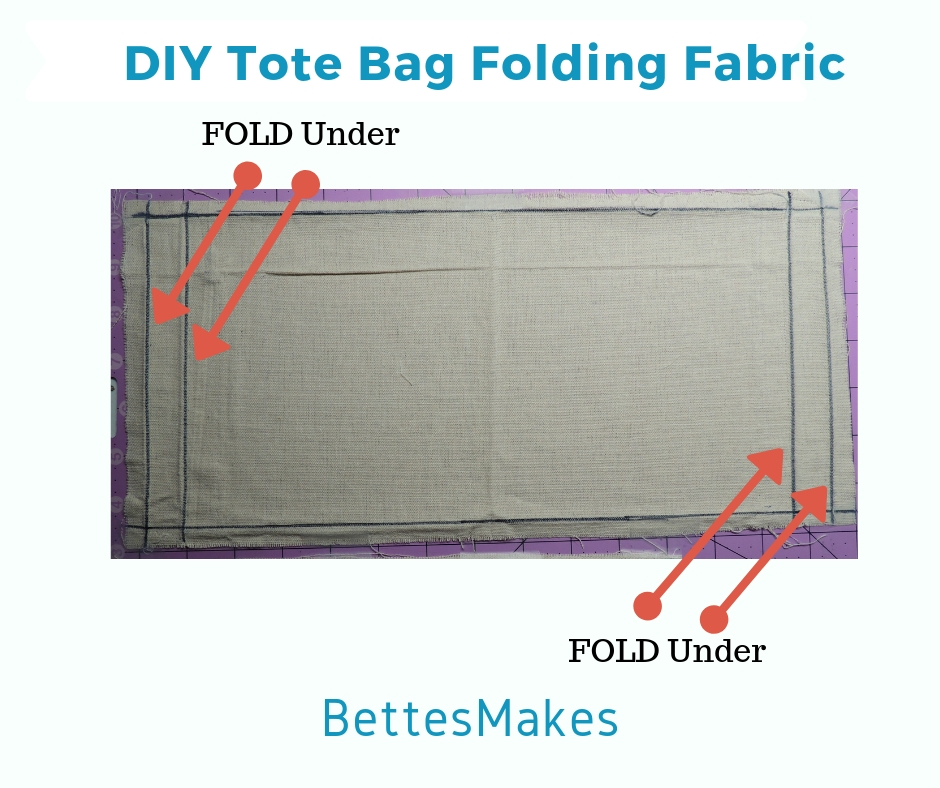
- Fold over the rough edges and iron them flat so the unfinished edges are folded away from the patterned surface. See the image below.
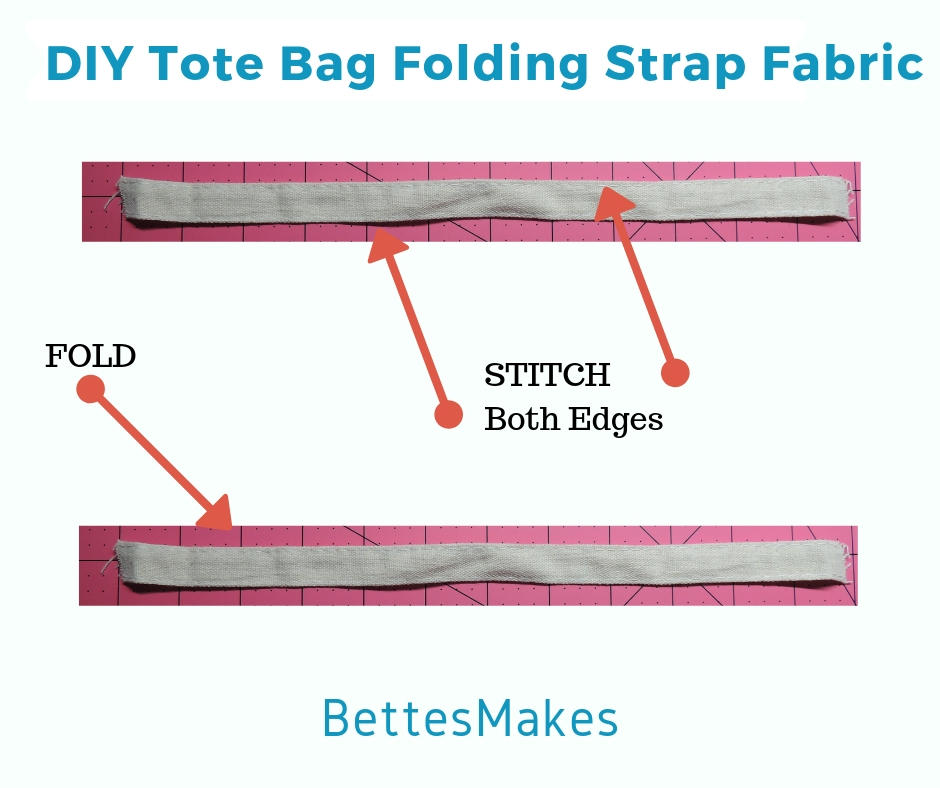
- Now fold the handle in half and iron down the fold. Make two lines of stitching. one at the center and one at the edge (both ends should be folded inside the handle). See the image below for how your finished project should look. Do this for both handles and set aside.
Step 5 – Assemble the body of the DIY Tote – Fold the fabric in half lengthwise and iron it flat. Stitch the edges from the fold to the top – the seams should be approximately 1/4″ to 1/2″ wide.
Step 6 – Iron the top edges – iron the first portion at the 1/2′ mark and then fold one more time at the 1 1/4″ mark – this will set you up to stitch in the straps and the top of the DIY Tote.
- You will be making two seams that will hold the handles in place and make clean edges for the top of the bag.
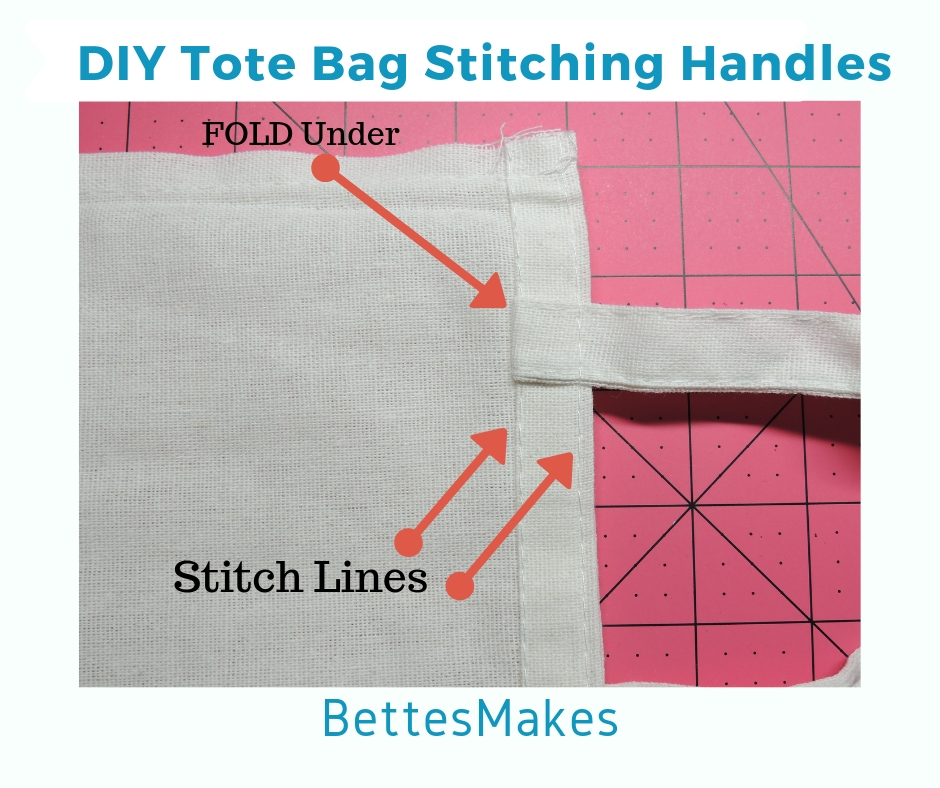
- First, place the handles 1″ from the side and fold under the seams and pin in place. Repeat for the other end of the handle. Do the same for the second handle.
- Next, make a seam along the bottom part of the fold – you will be sewing from the inside of the DIY tote so you can see the edge of the fold.
- Lastly, turn the tote to the right side and make a seam approximately 1/8″ all around the top. This will secure the handle in place and make a nice finish to your bag.
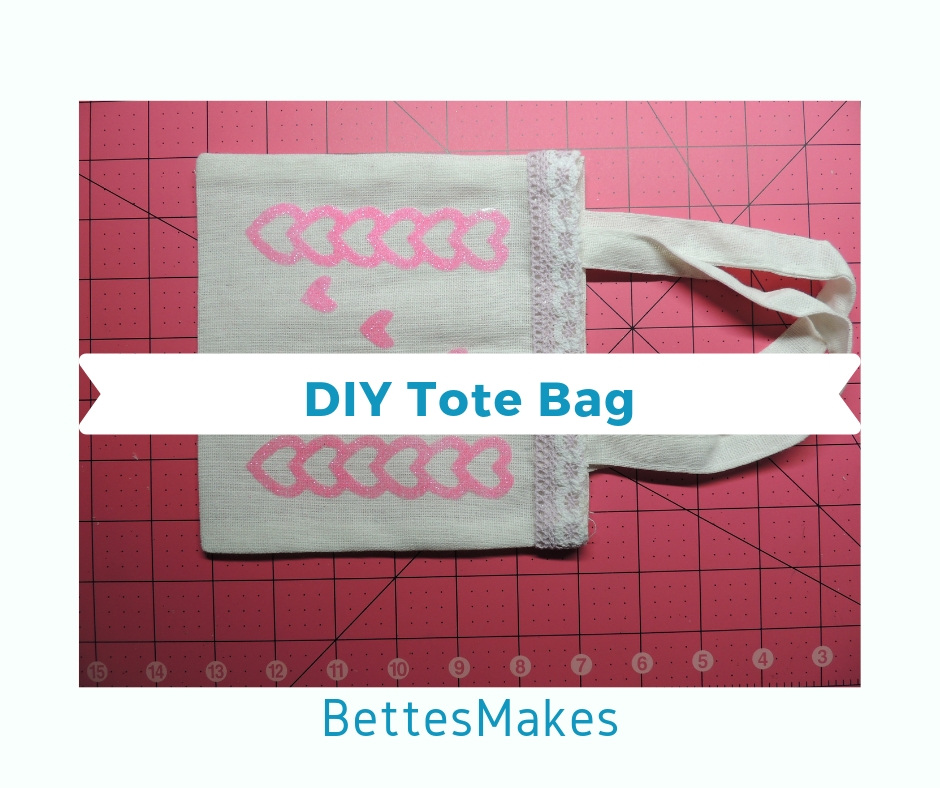
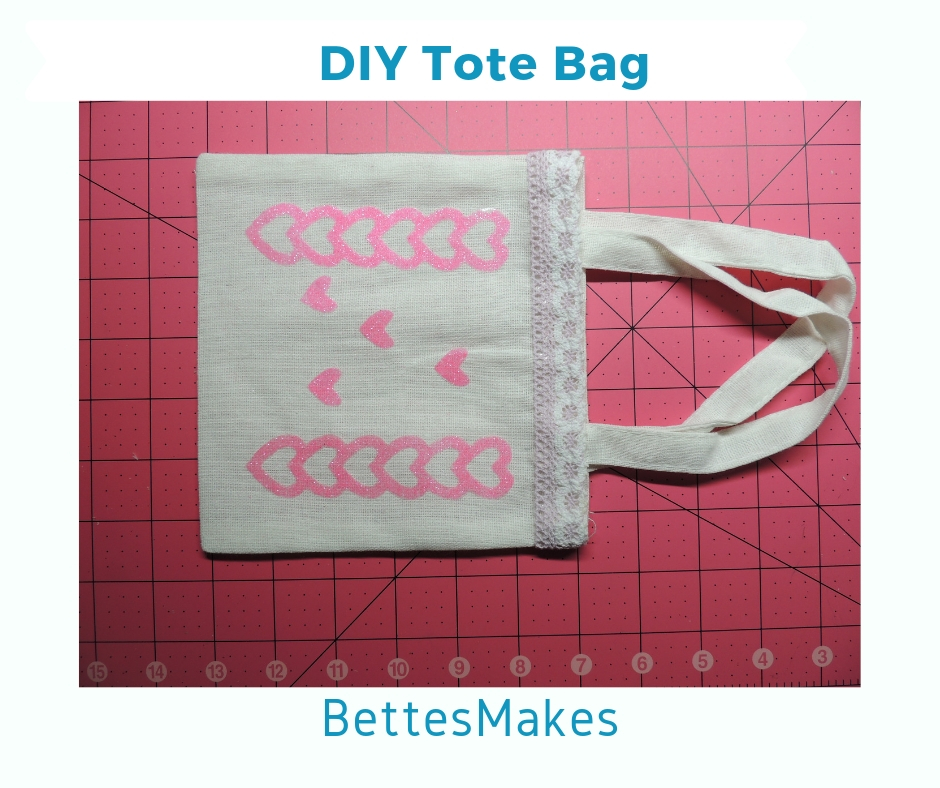
Step 8 – Add your decorations. I added fabric lace Washi tape and vinyl hearts to my bag – this is where you can truly be creative with the look of your finished project.
Some Great Books for More Ideas
Videos to Help you Along the Way
How to Sew a Simple Tote Bag
DIY Reversible Tote Bag
How to Sew a Strong Market Bag
Last Word
This DIY Tote is small and very practical for small outings and in reality kids really love having their own purse! Add a few knick-knacks to the bag – perfect for carrying around snacks for recess or a small outing. I have 3 or 4 of these DIY totes handy at all times.
Don’t forget to download the pattern for the project from my resource library. There are many other project downloads there as well, so take advantage of them all.
Did you make this tote? If so, please share it with me in the comments below or post it to my Facebook page.
Until tomorrow…
Bette
PS the password for the resource library is love
Please share the image below to Pinterest –
and Happy Crafting!