Are you ready to take your card-making a step further?
Are you ready to add some simple steps for more pizzazz to your card-making projects?
Are you having difficulty with matching the right papers for your cards?

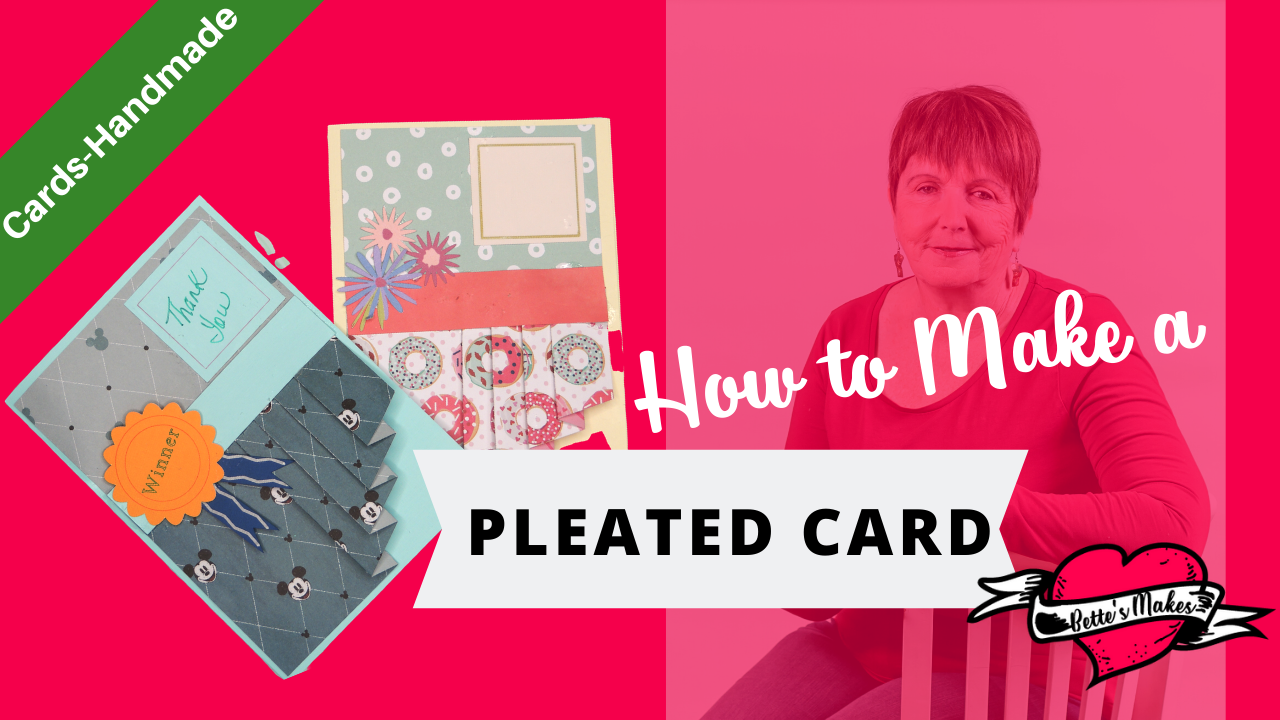
Be a Pleated Card Expert
You are a card-maker who understands that there so many more techniques to learn that are easy to implement. Every card you make is so personalized that they are unique and one of a kind, just like the paper choices you make. Adding pleat to your card making activities can add one more skill to your skill set. All this without having to measure the score lines and the cut lines. Everything is provided for you, except the folding and gluing!
This pleated card is just a start, you will be able to use the same template and change up how you apply it to your make. I found super examples on Pinterest and posted them to my Card-Making board - check them out!
There are so many ways to put this card together! I am going to take you through 1 so you can get the hang of it, then go and create more designs of your own. You can get the FREE template for this project from my resource library.
Here’s what you need to make your Pleated Card. This post does contain some affiliate links for your convenience (which means if you make a purchase after clicking a link I will earn a small commission but it won’t cost you a penny more)! Read my full disclosure policy.

Quick Links to Information in this Post
Pleated Card Materials
Pleated Card Step-by-Step Guide
Step 1 - Template

Download the template files (resource library) for this project and upload them to Cricut Design Space.
There will be 2 files:
1. Pleated Card SVG
2. Merit Badge SVG
Remember you will need to choose some cardstock that fits the project - 2 sheets of 12 x 12 double-sided will work the best. 1 sheet is for the card itself and a plain neutral color is recommended.
For the second sheet a patterned on both sides is great as you will need to cut then flip one of the cuts over.
Step 2 - Design Space Adjustments


Make changes to the SVG files from all cut lines to cut, score, and draw lines as shown.
Make the following changes to the files.
1. Ungroup all parts but do not move them around, yet.
2. Change the colors to something other than black. Otherwise you will not be able to see the score lines.
3. Change the inside lines of the top piece to scorelines. See the diagram on the left. After you change these, attach the scorelines and the large piece together.
4. Change the center line of the card piece to a score line and attach the two pieces together.
5. Select the colors as follows. The card piece, the center stripe and the greeting to one color for cutting out of the plain neutral card stock.
6. Select the remaining pieces and make sure they are colored the same - these pieces will go on the patterned card stock. There should only be two pieces - see the diagram on the left.
NOTE: You may have to unattach and ungroup pieces in order to change their color.
MERIT BADGE
I have provided you with a merit badge (also some flowers in a different file, if you want to download these as well).
You will need to make the following adjustments:
Ungroup the badge so you have the bottom ribbons and the top circles.
BOTTOM RIBBONS
Change the inner lines to "draw" and choose a color.
Select the ribbon and the lines then attach them together.
BADGE CIRCLES
Change the inside circles to "draw"
Add text to the center of the badge and set the text to "draw" Make sure you choose a different color from the circles.
Select all the parts and attach them.
SAVE YOUR FILE
click on MAKE IT !
Step 3 - Make it!

Check your mats and the processes to make sure all the lines are being processed correctly. In other words, make sure you are scoring and cutting in the right locations.
If you want you merit badge and ribbon on separate mats, you can move them before you click on continue.
Make sure you know which mat has the plain card stock and which one has the pattern. Although the other way around is not likely the outcome you are looking for, it will still work.
You will only be using 2 tools for this make. The scoring wheel or tool, and the fine point blade.
Step 4 - Assembly


Here is the fun part!
THE CARD
Fold the card in half at the score line and crease it with your spatula so it is nice and crisp.
THE PLEATS
Take your pleated piece and fold them back and forth with valley and mountain folds. Make sure you start on the short side with a mountain fold. Burnish (crease) the edges to get a nice tight fold.
Glue the upper edges of the pleats (on both sides) together, clamp them together and let them dry.
ASSEMBLY
Take the upper piece of the patterned paper and make sure you reverse the side from the pleats.
Glue it to the top portion of the card, making sure you center it and only leave a small edge at the top.
For the pleats, apply glue to the large area on the left and the upper part of the pleats. Adhere it to the bottom part of the card, try and leave a small gap at the top and the bottom edge, plus center the sides as best as possible.
Add the center strip. Glue the center strip over the bottom edge of the upper patterned piece and the pleated piece.
MERIT BADGE
Affix the ribbon part of the badge in a location you will like.
Add the circle portion with the writing on top of the upper portion of the ribbon.
YOUR PROJECT IS NOW COMPLETED!
Share your project on https://facebook.com/groups/BettesMakes
Reading About Pleating Ideas
Wow, I really never knew there were so many ways to make pleats! I certainly have had my eyes opened on the possibilities. I must admit I did buy the Complete Pleats book below and have devoured it!
Of course, you will want to check all of these out and maybe add at least one to your crafting library!
How to Make Pleated Card - Video
Last Word
This simple pleated card should spark your imagination! Can you come up with other ways to apply pleats? Take a look through my Pinterest board on card making for some more pleating ideas. Turn the pleats back to back and trim the excess away for an entirely new look.
Make the template smaller for another way to design the placement. Use thinner paper and use the pleat in a popup! Don't limit your imagination here - share your ideas with me in my Facebook group. https://Facebook.com/groups/BettesMakes , I would love to see them!
Until next time,
Happy Crafting!


Please join me on Pinterest: https://Pinterest.ca/BetteMakerCreations
Join my Facebook group: https://facebook.com/BettesMakes
Follow me on Instagram: https://Instagram.com/BettesMakes
Subscribe to my YouTube Channel: https://www.youtube.com/c/BettesMakes
Please pin this image to your favorite board so you can access this article at any time. Thank you.
