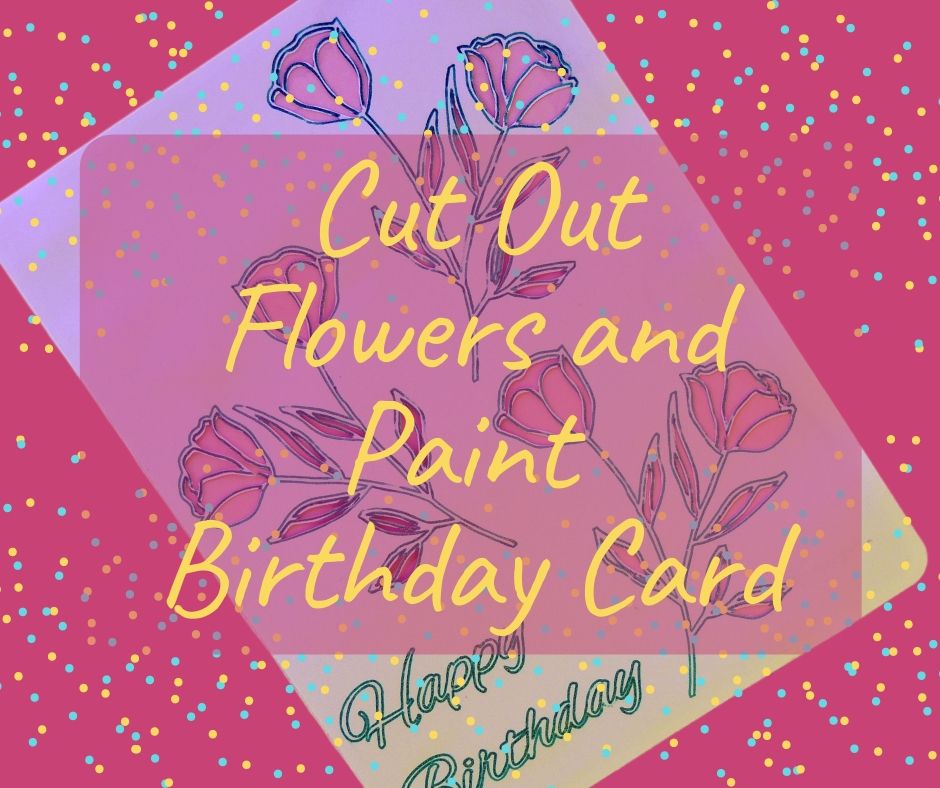
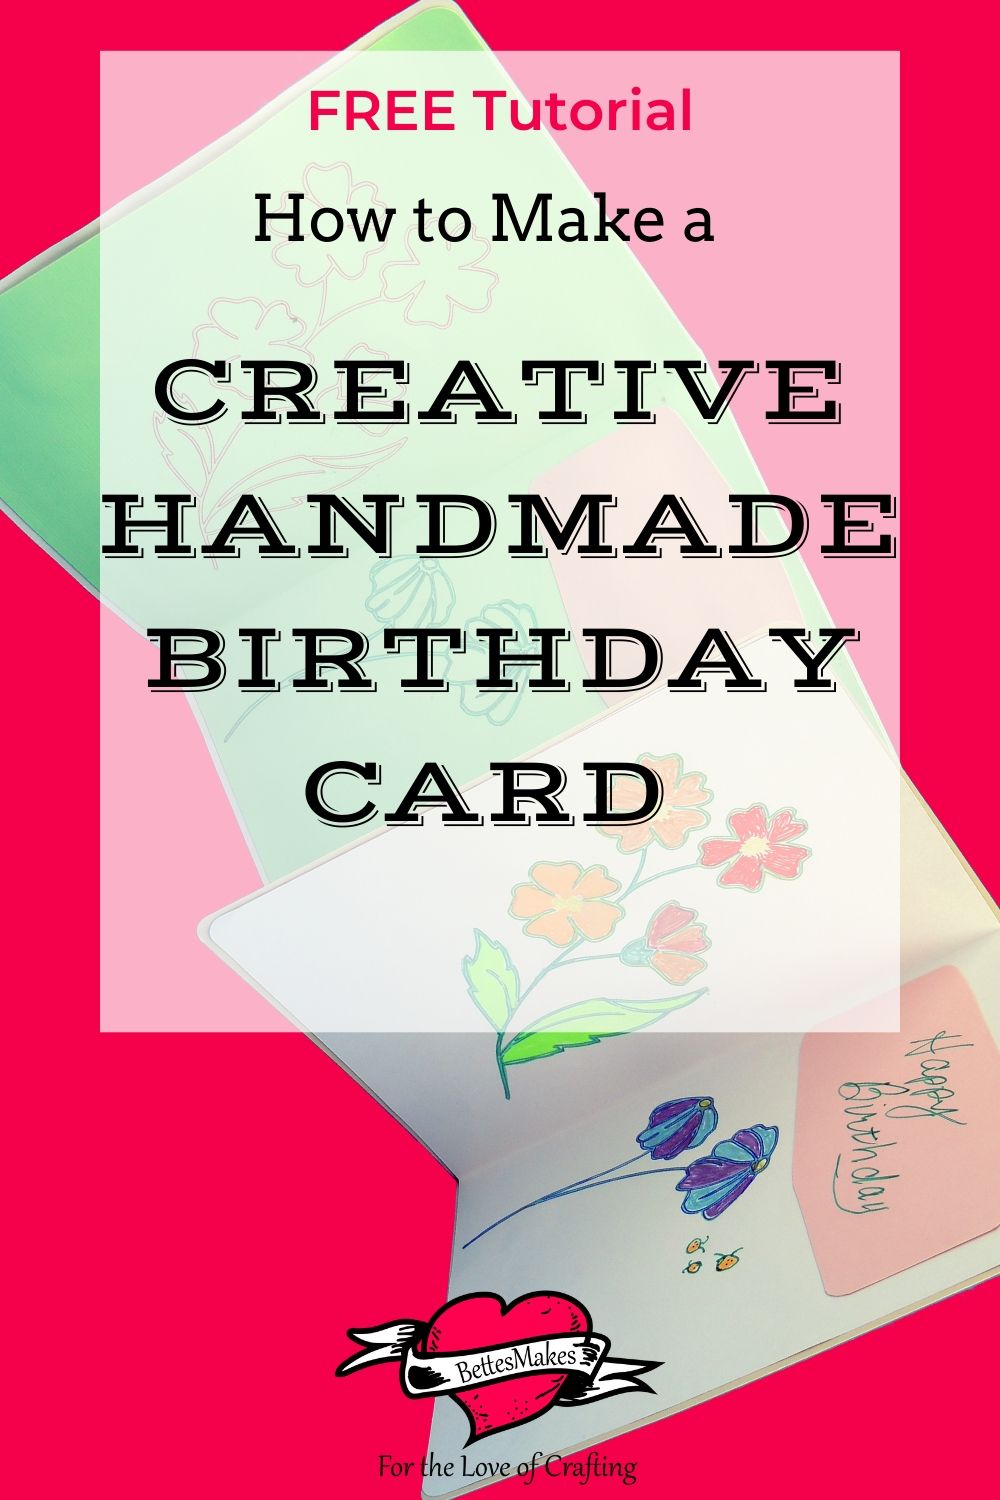
Are you looking to make a really cute handmade birthday card?
Creative Handmade Birthday Card with Cut Out Flowers
Creative and fun to make. This handmade birthday card has a lot to offer the recipient and also for the maker! You can add your own color palette to the outlined flowers on the inside of the card. This card has a standard fold, but what you do with the design will really make you stand out when you make it for your friends or family.
This project works on all Cricut cutting machines: Explore Air 2 (or earlier version), Maker, and Joy.
You do not need a ton of fancy materials here, just cardstock, a pen that fits into your Cricut, and a set of pencil crayons (or markers, or even paints). Most of the work is already done for you so this makes it a perfect project for beginners.
I have also provided the template for this card in my resource library (#275), so be sure to download it right away.
Here’s what you need to make your creative handmade birthday card. This post does contain some affiliate links for your convenience (which means if you make a purchase after clicking a link I will earn a small commission but it won’t cost you a penny more)! Read my full disclosure policy.
Creative Handmade Birthday Card Materials
Creative Handmade Birthday Card Step-by-Step Guide
Step One - Download the Template (#275)
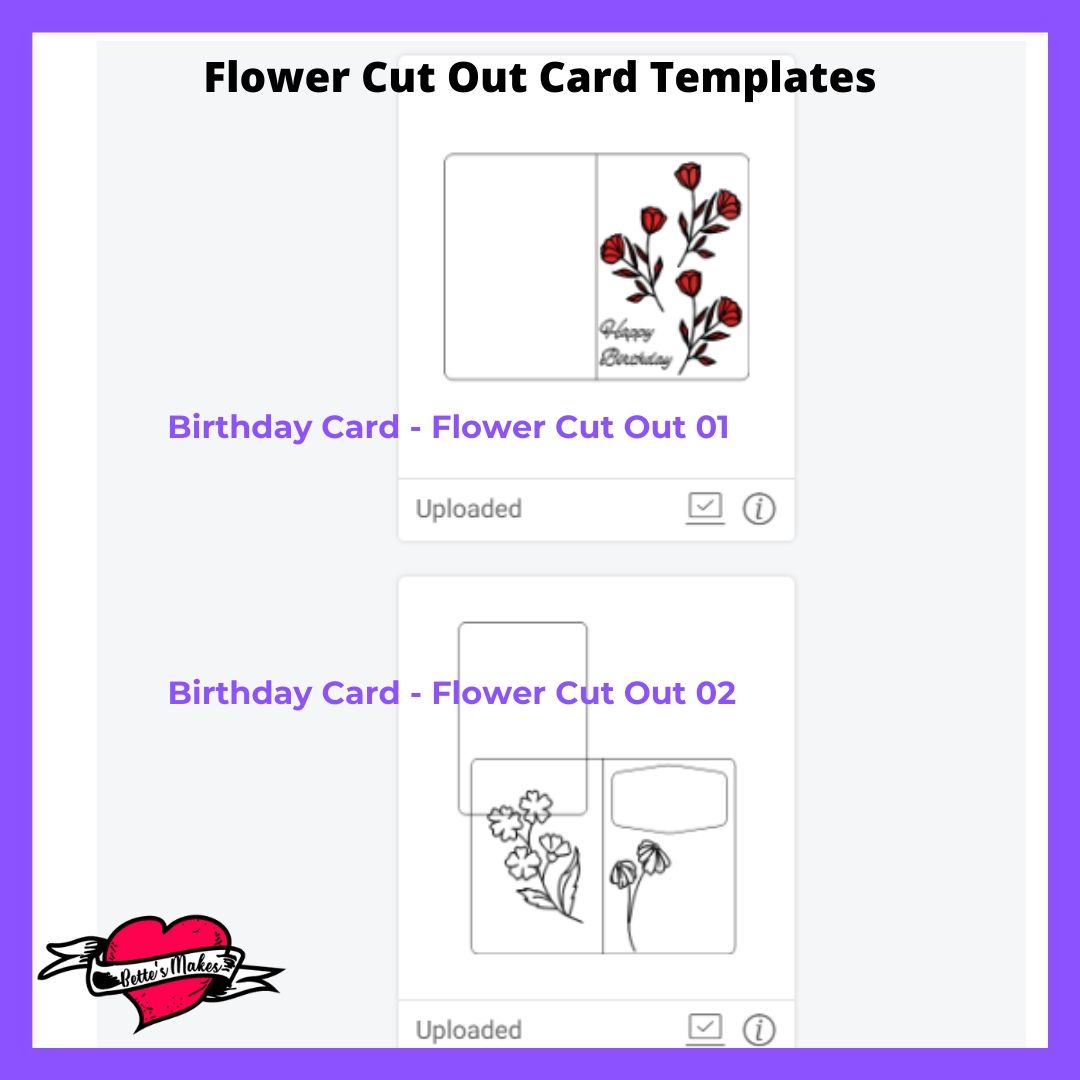
There are 2 files you will need for this make. They will both be inside a zipped file called Creative Handmade Birthday Card.
Birthday Card - Flower Cut Out 01
Birthday Card - Flower Cut Out 02
Unzip the file then upload the files into Design Space.
Select both files and insert them into a new project.
Step Two - Design Space Color Changes
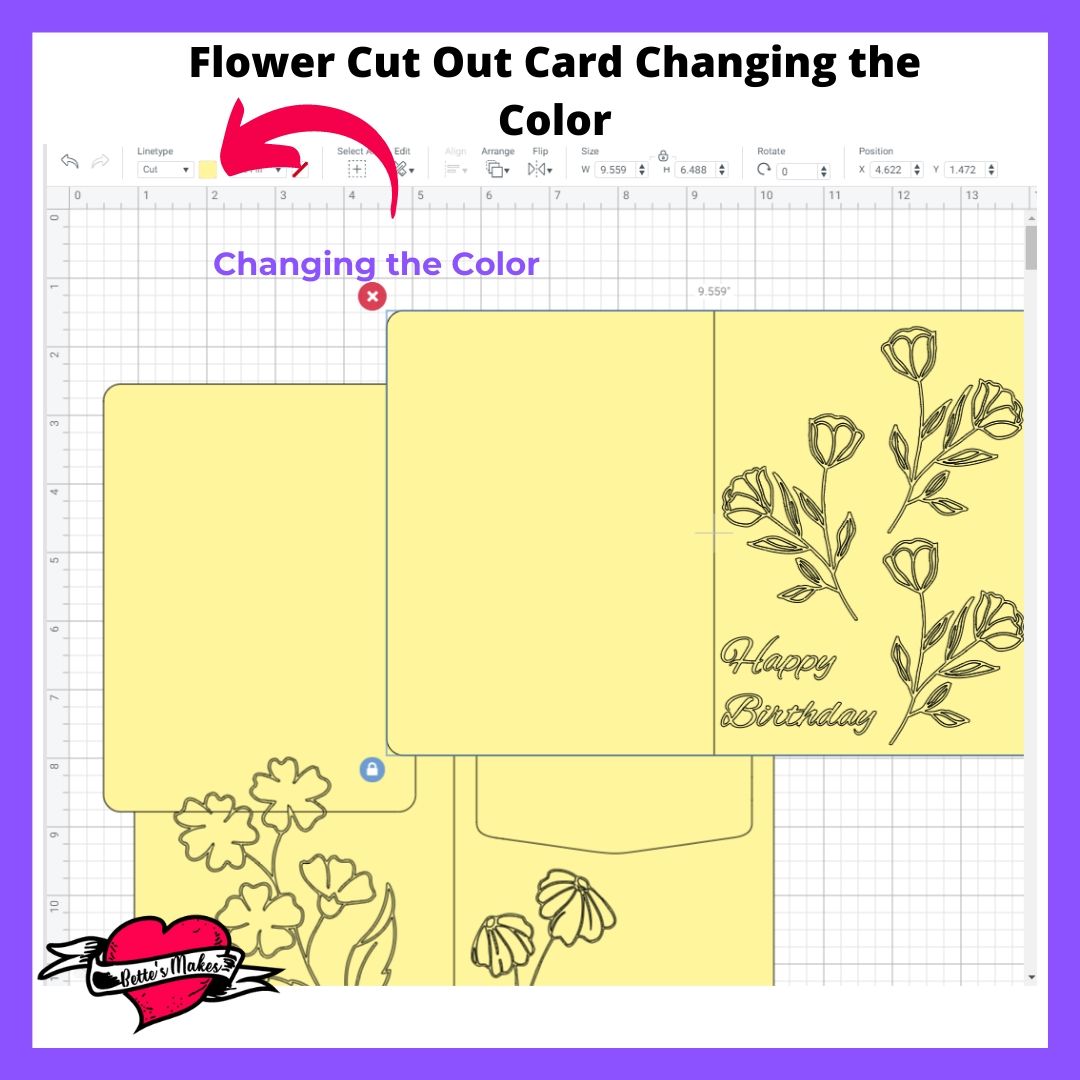
Once you files are uploading and placed onto your canvas, you will find that they come in as black! You will not be able to see any of the designs or lines while they are black.
Select your objects on the screen, then click on the question mark that is displayed underneath Linetype on the Toolbar.
Select a lighter color so you can see all the lines. If you missed selecting any object, you can always select it at anytime and change the color.
Step Three - Design Space Objects
Here is where you really need to know what needs to be changed in order for your project to print, score, and cut properly.
All of the flowers in the design need to be drawn plus the flowers on the front will need to have the petals cut out so the underneath paper will show through.
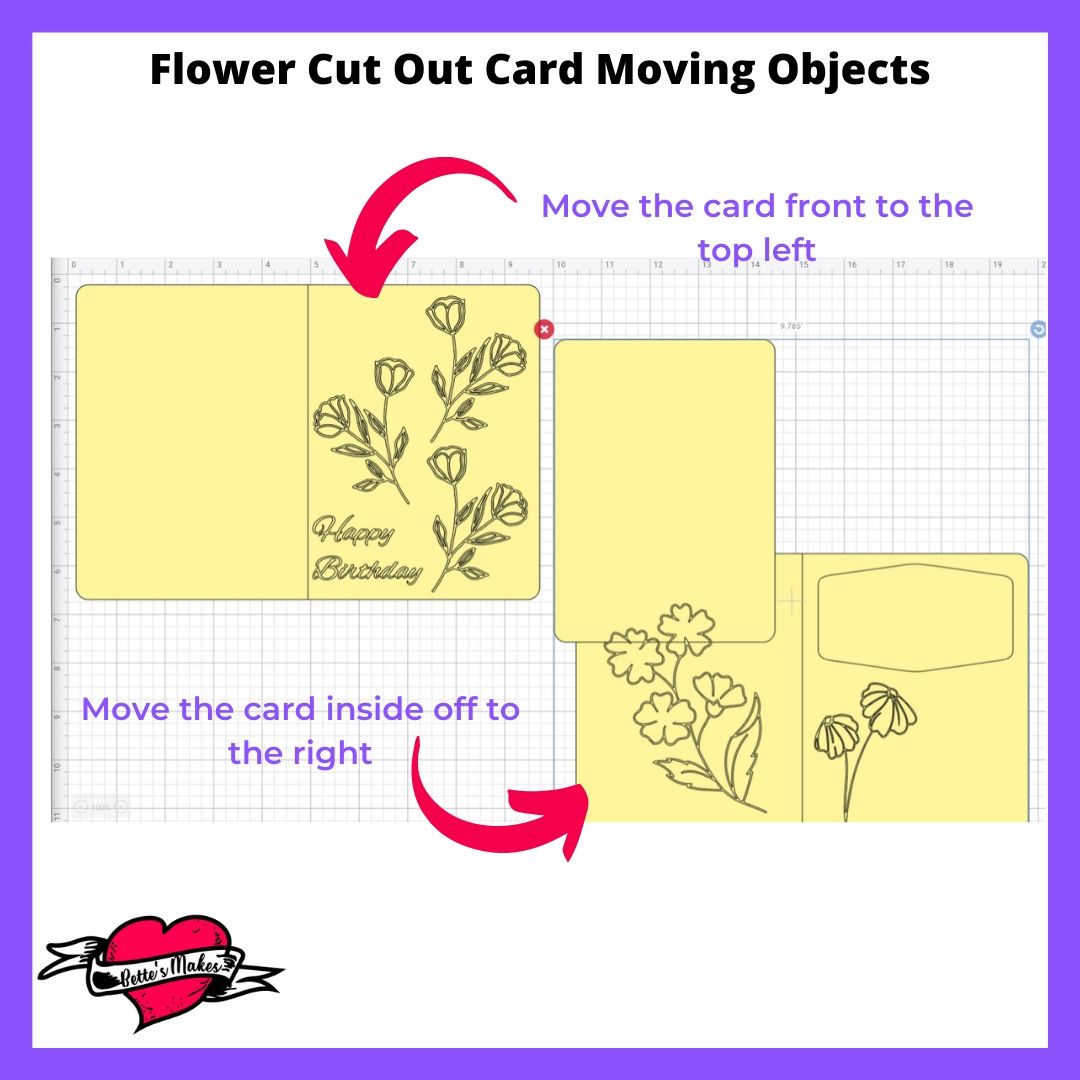
Before you Ungroup anything, you will want to move each object in a location on its own. There will be 2 objects, the front of the card and the inside of the card.
To make it easier for all the adjustments you need to make, slide the card front to the top left corner of the canvas and the card inside group off to the right. This way it will be easier to work on each piece as we need.
Step Four - Design Space Line Changes - 1
Let's first work with the card front.
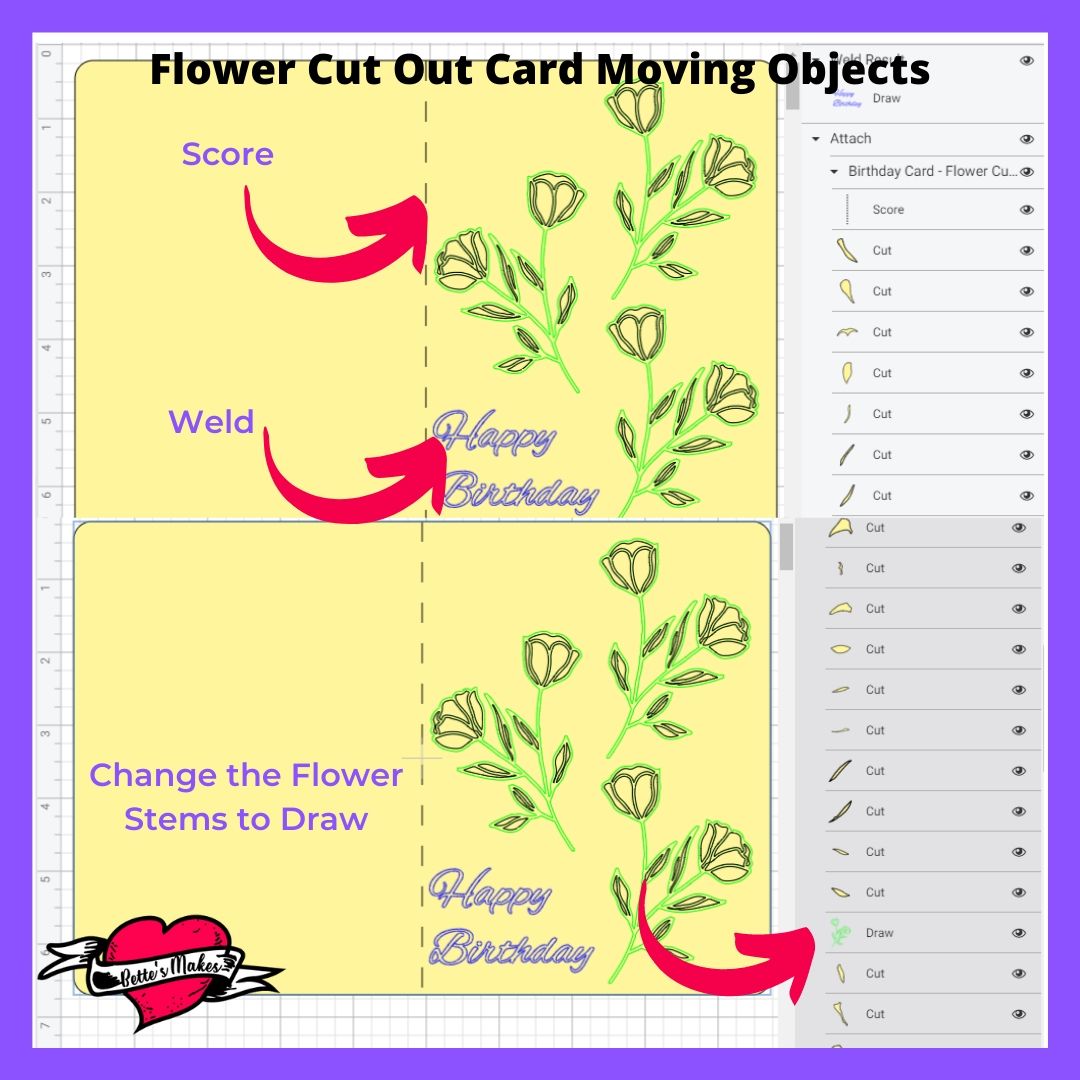
In the Layers Panel, look for the letters and groups of letters (including the dot above the i) and select them. Click on one letter then depress the shift key and click on the other letters, one at a time. This will select the whole "Happy Birthday". Once you have them all selected, Click on Weld (bottom right of your screen).
Go to the Linetype drop-down box and select Draw. Change the Draw Color to blue - this way you can see if you selected the whole greeting.
The top object listed in the Layers Panel should be the center line for the card, you will need to change this to a Score line.
Next, you will be selecting each of the flower groups and changing them to Draw and choosing a new color.
You will have to scroll down the Layers Panel to find each one to make the change. Do not worry about all the little pieces that are being cut - we want those to cut.
Step Five - Design Space Line Changes - 2
Now we will make the changes to the inside of the card.
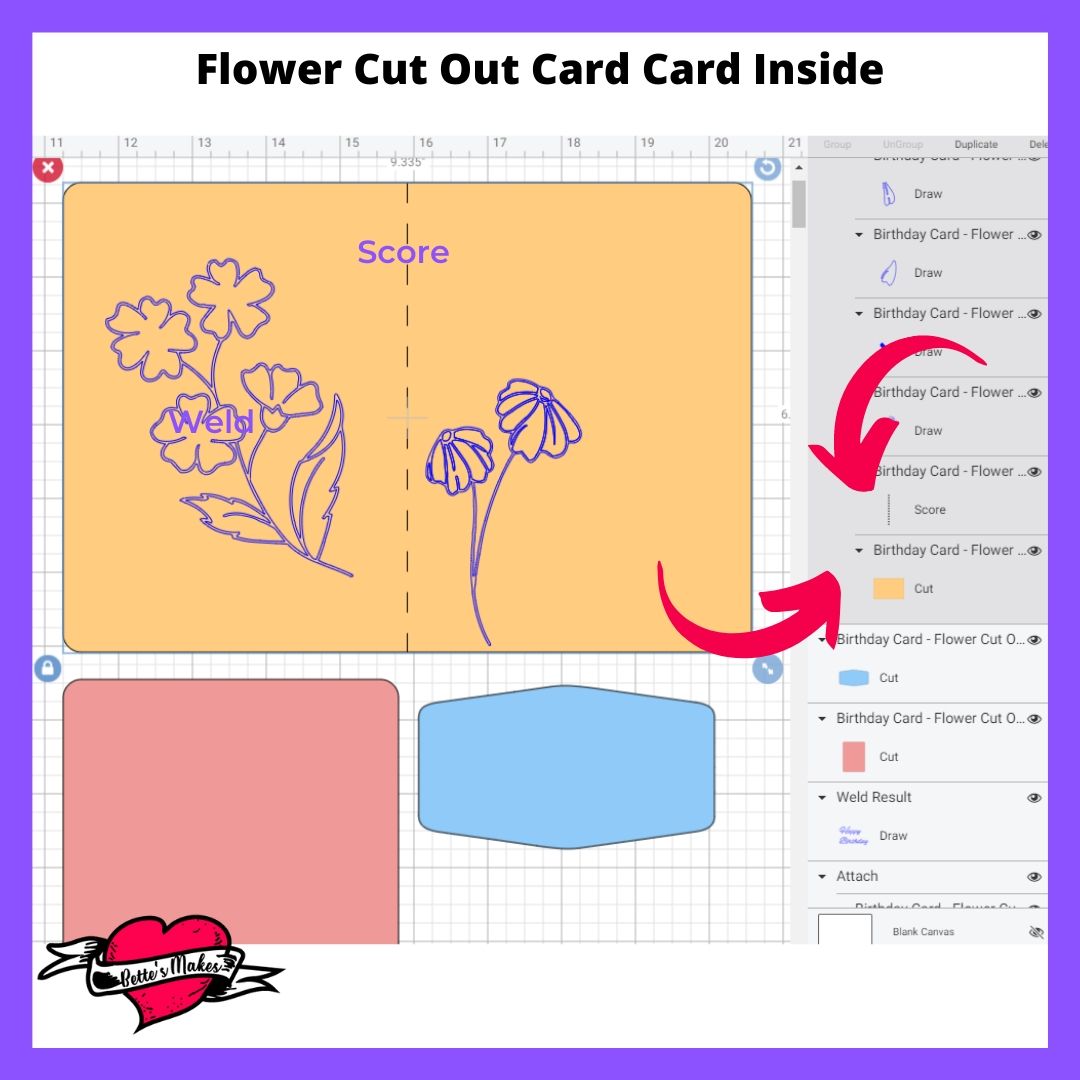
The inside of the card has 3 parts. One is the rectangle cut out that will be used to be the backing to show through the cut flowers on the front. The second one is the polygon shaped piece that will be the place you will write your greeting, The last part is the inside of the card.
To begin, you will need to Ungroup the set.
Move the rectangle and the polygon out of the way so you can work on the card inside. We will not be making any changes to these two pieces except to change their color.
I am going to show you a shortcut for selecting all the flower parts and changing them to Draw.
Select over the entire card inside and go to the Linetype and change it to Draw. Now everything has lost color. Change the draw Color to blue (this is so it will show up on a mat that is not black). We will be making two more adjustments to make the card cut the way we want it to.
Select the center line, change it to a Score line.
Select the outside perimeter of the card inside and change it to a Cut line. The card will instantly turn black. Change the Color to a lighter color so you can see all the lines on the card.
Finally, Select the entire card inside, Group it, and then choose Attach.
Step Six - Checking Cuts and Selecting Materials.
Remember to Save your project then click on Make It.
Cricut Design Space will now sort your project into mats. Go over each mat to make sure everything looks the way it should before you proceed to the next step. If something does not look right, you should cancel the make and make the changes.
The most common error is forgetting to Attach everything together. Score lines are often not attached to the card itself.
When everything looks good, click on the Continue button and select your materials.
For the rectangle, you will likely want a glitter card stock or bright color to shine through the cut out flowers on the front but ultimately, the choice is yours.
Reminder: You can change the material for each mat just before you load it into your Cricut cutting machine.
You are now ready to cut, score, and draw your project. Just follow the instructions on the screen for each mat as you load it.
Step Seven - Assembling the Card
After the card is cut, scored, and drawn, gently remove the parts from their mats. Try peeling the mat from the cardstock so your card is not warped.
Fold the inside and outside of the card along the score lines. Make them crisp by smoothing them down with a spatula.
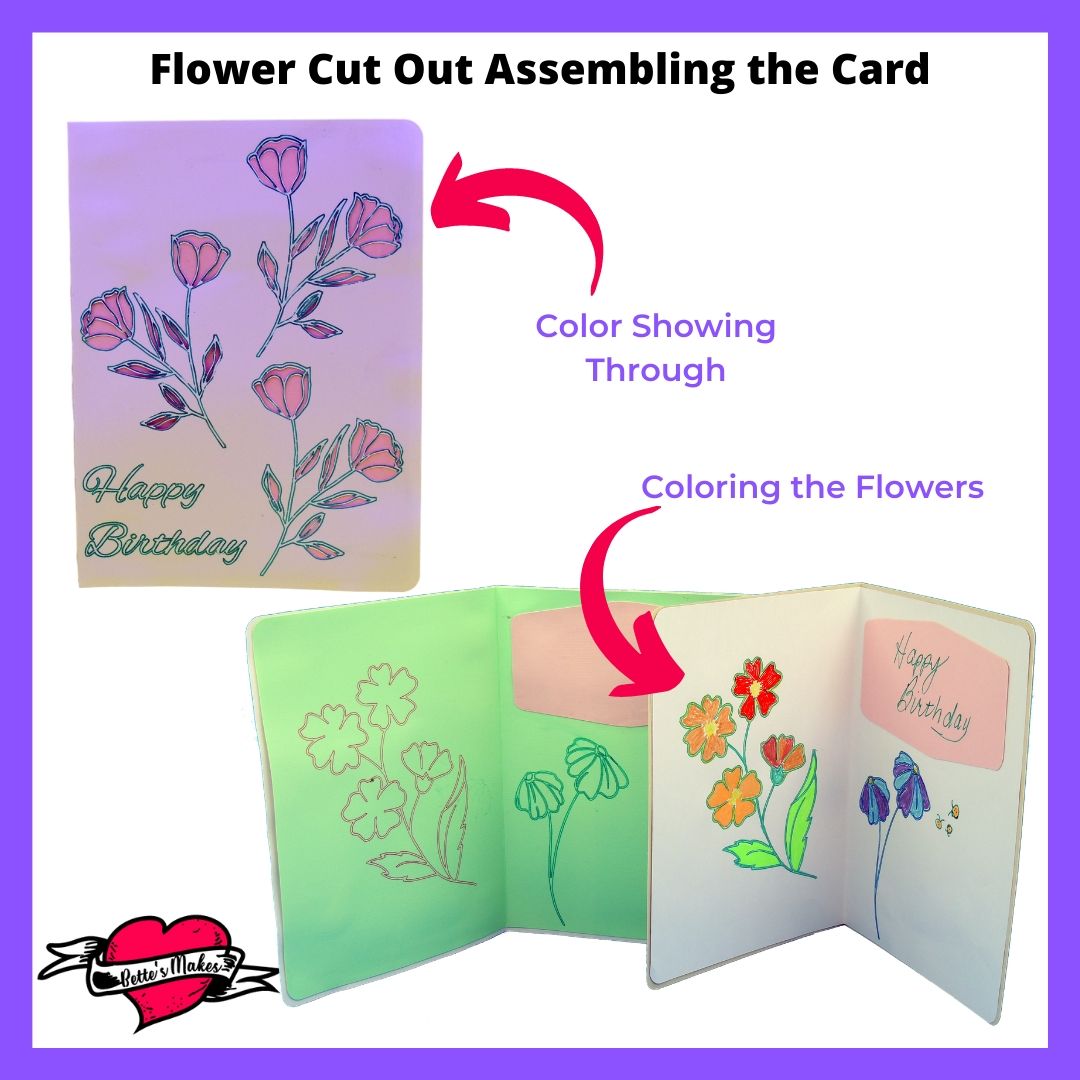
The biggest change here is to remove the extra bits from the flowers on the front of the card. Check to make sure all the cuts are in place and the little pieces have been removed.
Glue the rectangle piece to the back of the cut out flowers so the color shines through.
Glue the inside of the card in place and then glue the greeting polygon in place.
Glue the inside of the card into place.
The Final step is to color the flowers that are in the inside of the card. This will give your card a special unique look!
Show off your make in my Facebook group! https://Facebook.com/groups/BettesMakes
More Craft Ideas from BettesMakes
Here are some amazing crafts you can make from BettesMakes.com
This is just a sampling of the dozens of crafts you can find on my website.
Last Word
This card was a lot of fun to make, it had lots of design elements such as the cut out flowers and the hand painted flowers on the inside of the card. This card was much simpler to make than at first sight. A perfect make for beginners wanting to explore other ways to make cards.
At first it looks so complicated, but once the steps are broken down, it is very easy to make.
For me, I am not the best artist but I can say I really enjoyed coloring in the flowers!
I hope you enjoyed this project as much as I did.
If you made a card, please share it on our Facebook group. https://Facebook.com/groups/BettesMakes
Until next time,
Happy Crafting!


Please join me on Pinterest: https://Pinterest.ca/BetteMakerCreations
Join my Facebook group: https://facebook.com/BettesMakes
Follow me on Instagram: https://Instagram.com/BettesMakes
Subscribe to my YouTube Channel: https://www.youtube.com/c/BettesMakes
