Have you always wanted to make a Shadow Box Card but were not sure where to start?
Have you ever wanted to take your card making to the next level?

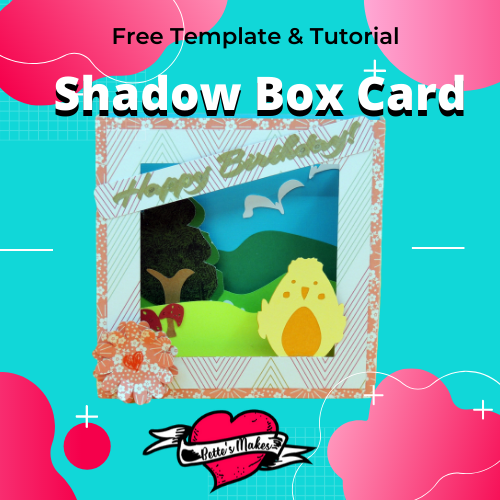
Shadow Box Card that will Put a Smile on Your Face
Shadow box cards always look so complicated, would you not agree? I can imagine how you would put off making one of these incredible cute and easy to make cards without knowing the simple steps to get started.
I read many different blog articles to see what would work best, I even bought a magazine or two to see if the directions would be easy to follow. The truth is, most tutorials leave out one or two directions and leave you hanging! I knew I had to make this work so you could easily make your own with little effort.
I took the ideas and came up with my own design based on all those other places I had visited. I do hope you find this so easy to make, you will come back often to learn how to make more cards and other projects.
You can always visit my resource library and get templates for all my projects (each one generally has a tutorial to go with it).
Here’s what you need to make your Shadow Box Card. This post does contain some affiliate links for your convenience (which means if you make a purchase after clicking a link I will earn a small commission but it won’t cost you a penny more)! Read my full disclosure policy.
Quick Links to Information in this Post
Shadow Box Card Materials
Shadow Box Card Step-by-Step Guide

Step One - Download the Template
The template for this project comes in 2 files. Make sure that you download both of these before starting.
Upload the template to design space, then ungroup everything and change any black colored items to a lighter color - this way you will be able to see any extra lines that need to be changed int he next step


Step Two - Design Space Adjustments
As with any project, you will need to make some adjustments for score lines, draw lines, and cut lines. So here is what you need to look at for this project.
SCORE LINES
The score lines will mainly be on the box outer shell and the hills that will be glued inside.
For the hills, you will find two sets of hills that have lines near the left and right sides. Change these lines to score lines, then attach both score lines to the hills.
For the box outer shell, you will need to move the extra rectangles out of the way so you can see the 4 lines that make up the side folds. Change each of these lines to score lines, then attach the lines to the box.
DRAW LINES
In this project there are only a few draw lines you need to change from CUT to DRAW.
First, the Happy Birthday on the banner needs to be set to draw. You also need to attache the greeting to the banner.
Second, the flower has a circle in the center. Change that circle to DRAW and attach it to the flower, There is a second flower, but you do not need to do anything with this one.
Lastly, The bug and a center ellipse which needs to be changed to DRAW. Be sure to attach the center to the bug.
CUT LINES
Everything else in the project has cut lines. Make sure you go back and check that you do not have cut lines where score or draw lines should be. That means you need to check your mats after you click the MAKE button!
COLOR SELECTION
You will want to use a double-sided print cardstock to make the box. There are several pieces you should color the same in order to have them cut on the same mat.
1. The box
2. The 2 long rectangles.
3. The banner
4. the hollow square
5. The daisy flowers
The remaining pieces such as the tree (green and brown), the mushrooms (red, brown), the chick (orange, yellow), and the seagulls & bug (white) are going to be small cuts. You can combine them all on one mat, if you wish, then place the right colored cardstock at the right position for cutting the colors. I find it much easier to simply place a small amount of material on a mat and let it cut that way.
TIP: if you want to change the color of an item that is already attached, click on the item in the layers panel to select it, then change the color on the toolbar.
ATTACH
Don't forget that you should always group, then attach score and draw lines for each shape you are working with. Attaching will ensure that your project cuts, scores, and draws the way you expect it to.
Now it is time to click MAKE, figure out your materials, and set you machine to work.

")


Step Three - Assembling the Shadow Box Card
BOX
Start by deciding which side of the double-sided cardstock you want on the outside. Once decided, you will reverse that choice for the other pieces.
For the box you should have the following parts:
1. Box frame
2. 2 Rectangles the length of the box
3. A square window frame
4. A banner
5. 2 flowers
Start by scoring the box frame sides so the sides fold inwards. See the diagram.
Center the rectangles on each side of the box and glue them in position.
Glue the hollow square onto the front of the box frame.
We will add the banner and flowers later.
BACKGROUND AND HILLS
The pieces you need for this are:
1. The blue square background
2. A large hill with no score lines
3. 2 small sets of hills with score lines on each side.
4. 2 seagulls
Start by gluing the large hill (no score lines) to the background. Adjust it so that the two bottom edges are flush.
Score the other hill pieces so that both flaps go in the same direction.
Glue the seagulls in place at the upper right side of the background.
TREE, BUG, MUSHROOMS
You should have several pieces as follows:
1. 2 tree tops
2. A tree trunk
2. 2 mushroom caps and 2 stems
Let's start with the tree. You have 2 tree tops. I like to offset these a bit to give the illusion of a rounded tree. Glue the tops together so the one top is more to the left. The glue the trunk on top about one -quarter of the way up from the bottom.
You will now glue the tree to the hill which is the larger of the two hills that have the flaps. I suggest gluing it to the left side on top of the hill.
For the bug, you can glue it anywhere near the tree for maximum effect.
Mushrooms - start by gluing the stems to the smallest of the hills at the front, then gluing the caps on top.
You now have most of the essential pieces in place. We will glue the chick and, flowers and banner a little later.
ASSEMBLING THE LAYERS
This will be the most difficult part to understand but once you get the hang of it, it will be totally smooth sailing.
You will be gluing the hills and backing on one side only to start.
Flip the box frame so the front is on your table and the backside is facing you.
Fold the flap on the small hiss so it is facing down and the decorations are facing the front.
Glue the flap so it is lined up with the score line at the front of the box. Line up the bottom edge so it is flush with the box - see the diagram for details.
Hold in place until the glue is somewhat dry.
Now take the second hill and fold the flap towards the front of the box and make sure the tree is facing the front.
Glue the flap and snuggle it up the the front hill flap, line up the bottom edge and hold in place until the glue is dry.
Now add the background to the box. Place the background square underneath the back flap of the box, line up the bottom and then glue in place.
You will now be ready to glue the chick in place.
THE CHICK
The chick comes in two parts. The backing (solid chick) and the front with the holes. Glue the chick background onto the the other chick with the holes. Line them two pieces up to match.
Next, glue the front part of the chick (the legs and small part of the lower body) to the box front on the side. See the diagram.
Let it dry.
COMPLETING THE BOX
You are now ready to glue the other side of the box in place.
You will follow the same process as gluing the first side together, except this time you will need to hold the sides at 90 degrees to make sure the hills glue in place properly.
Getting your fingers inside is sometimes difficult but holding the box into the correct shape will definitely help.
You are finally finished making the box and now for the embellishments!

Step Four - The Finishing Touches
The final touches are what makes a card so unique. For this project we are adding a double flower to the front and a banner that goes across the top
FLOWER
You will have 2 flower pieces, one with a center drawn in and the other one is plain.
Bend up the petals of the flower on both pieces and glue the centers together. You should offset the front flower to give the flower a more realistic look.
Glue the flower to the bottom left or right of the box.
BANNER
Glue the edges of the banner to the box on an angle at the top to finish it off.
Now that you are finished, it is time to share your project in our Facebook Group.
Share it on your own page as well and let others know about this tutorial.
Other Card Making Ideas You Will Love!
Why stop at just making a Shadow Box Card? Here are some other crafts you till love! Give a couple of these a try, and have some great crafting fun. Most of these cards look complicated, but they are very easy to make once you know how.
All of these projects can be found on BettesMakes.com
How to Make a Shadow Box Card
Last Word
I am sure I am just like you, I was amazed at how easy this Shadow Box Card was to make. I think I would add a few more flowers on the outside of the card or perhaps a couple of flowers on the inside.
Remember you can also change the chick for any other animal so you can use the card for any occasion.
You can change out the inner decorations for other scenes such as birds, horses, or cats. The choice is yours!
I hope you enjoyed this project as much as I did.
If you made a card, please share it on our Facebook group. https://Facebook.com/groups/BettesMakes
Until next time,
Happy Crafting!


Please join me on Pinterest: https://Pinterest.ca/BetteMakerCreations
Join my Facebook group: https://facebook.com/BettesMakes
Follow me on Instagram: https://Instagram.com/BettesMakes
Subscribe to my YouTube Channel: https://www.youtube.com/c/BettesMakes
Please pin this image to your Favorite Pinterest Board