Easy Cricut Infusible Ink T-Shirt Project

Infusible Ink for Iron-On Projects!
Many of us feel fear and overwhelm when it comes to making something new. I am no different. Infusible ink has been on my radar for a long period of time and I always had an excuse why I was not able to work on an infusible ink project. I finally purchased some t-shirts that had a high polyester count so I could test out my new project.
The first thing was to make a design I could “draw” with the Cricut! You can find the template in my resource library (Asset #334). I must say this was a lot of fun and I am definitely going to be making more infusible ink projects.
Are you ready to start making this infusible ink T?
You will also find the template already to go in my resource library (asset #334)

Here’s what you need to make your Infusible Ink T. This post does contain some affiliate links for your convenience (which means if you make a purchase after clicking a link I will earn a small commission but it won’t cost you a penny more)! Read my full disclosure policy.
Infusible Ink T-Shirt Materials List
T-Shirt any color with a high polyester count
Cardstock or butcher paper
Asset #334 from my resource library
Infusible Ink T-Shirt Step-by-Step Guide

Step One - Download the Template
To start you will want to download the template (asset #334) from my resource library.
Unzip the file and upload the SVG file only to Cricut Design Space

Step Two - Design Space Adjustments
Start by ungrouping everything, then grouping each flower with all its petals together. This way you will not lose pieces!
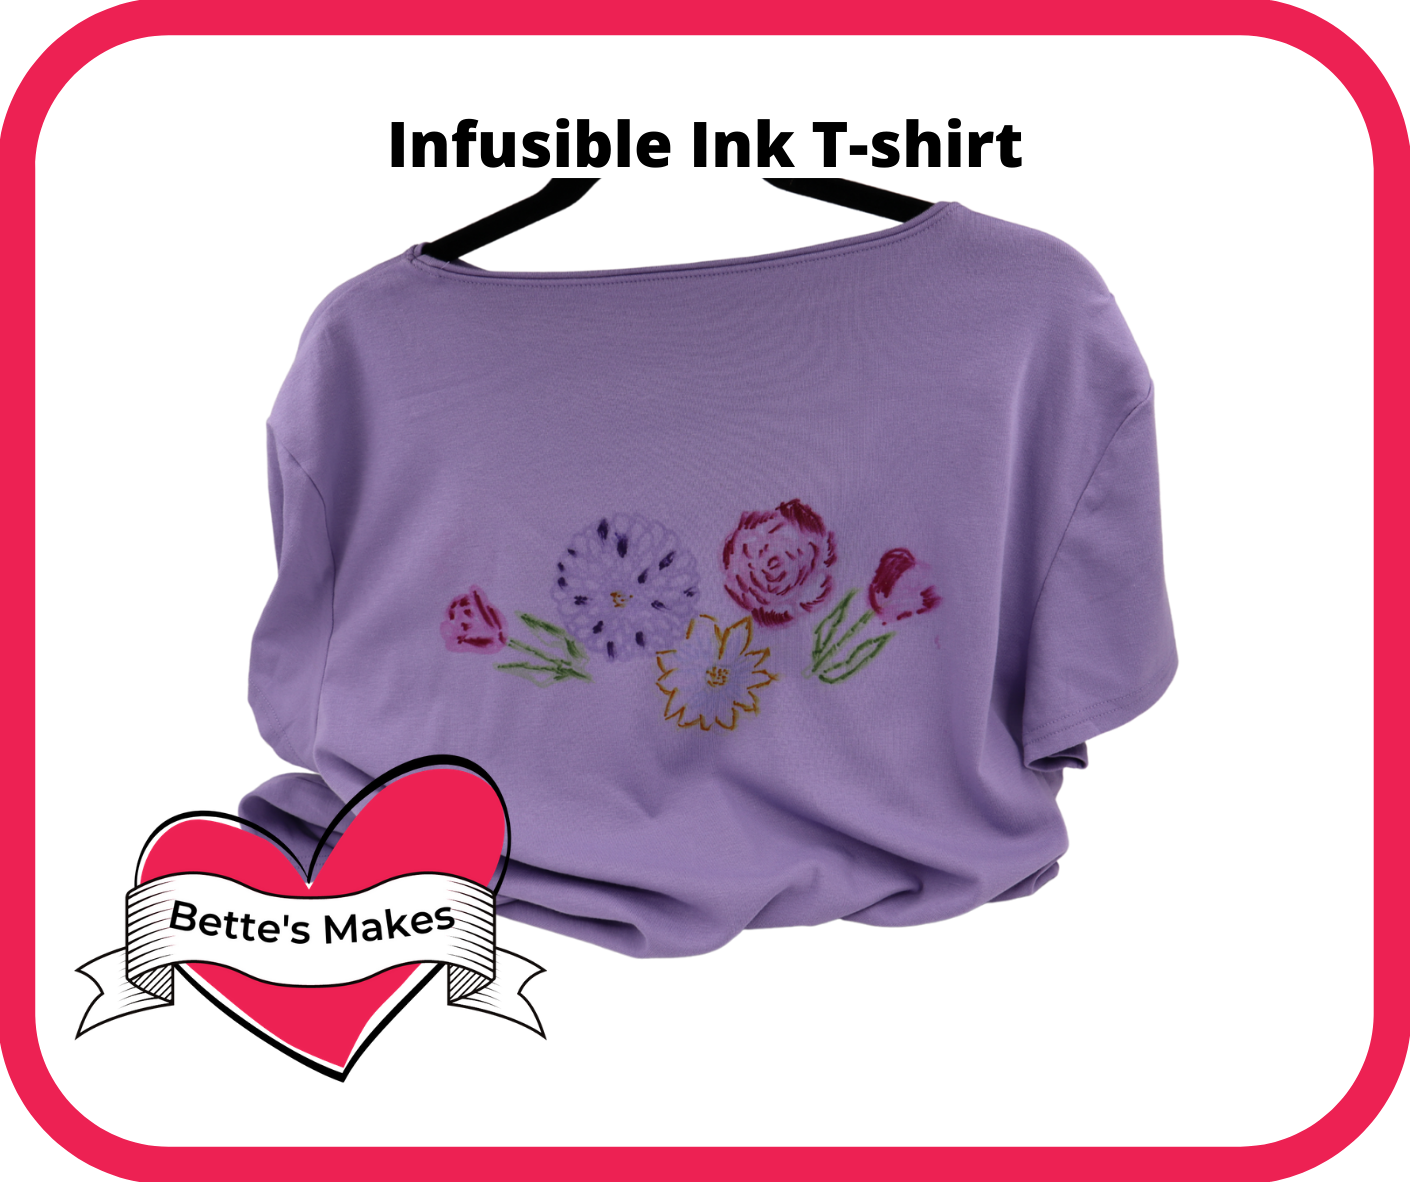
Arrange your flowers in any manner you wish. The image here shows the patterns I decided to use.
Select the flowers one at a time and change the Operation to Pen, then select a color - these will be the colors you will likely use to draw the flower. Do this for each flower.
When you have made all the color adjustments, select the entire project and click on Attach. This way your flowers will stay in the design shape you made.
You should also double check your layers panel to make sure all the flower pieces are set to pen. Often a stray piece may still be set to cut and you will need to change it to pen.

Step Three - Drawing the Project
Since you will be using your Infusible Ink markers, you will need to choose laser copy paper for your material.
Have your infusible ink markers ready and switch them out as prompted.

Step Four - Ironing-On the Design
Time to get out your EasyPress and set it up by using the Cricut Heat Guide for your material.
Each type of material will have a different setting. Here is the link to the heat guide: https://cricut.com/en_us/heatguide

Step Five - Ironing
For ironing, you want to be using a heat pad on the bottom, a piece of cardstock or butcher paper on top of the pad and then insert these into the t-shirt centering them as best as possible.
Flatten the front of the shirt and use a lint brush to remove any extra fibers.
Finally, lay the printed portion of the laser copy paper down on the shirt, place another piece of paper on top to absorb any bleeding.
Apply the EasyPress as directed.
Step Six - The Finishing Touches
Wait until your project has cooled before removing the laser paper from the shirt. Once everything has cooled down, remove the butcher paper or cardstock and the heat pad then admire your work!
More Craft Ideas from BettesMakes
Here are some amazing crafts you can make from BettesMakes.com
This is just a sampling of the dozens of crafts you can find on my website.
Layered Iron-on T-shirt - learn how to use different types of iron-on vinyl in one project.
Glitter Iron-On - this is a fun project that is easy to do
Irish Love - you don’t have to wait for St. Patrick’s Day to make this T-shirt
Last Word
Infusible Ink is now one of my favorite things to work with. I am learning new techniques all the time and I love sharing them with you.
You can paint right on any surface and use your EasyPress to infuse the ink right onto it. I love the possibilities!
Please join our Facebook group - https://Facebook.com/groups/BettesMakes and share what you have done plus join in the fun.
I hope you enjoyed this project as much as I did.
If you made an Infusible Ink T-Shirt, please share it on our Facebook group. https://Facebook.com/groups/BettesMakes
Until next time,
Happy Crafting!
")

Please join me on Pinterest: https://Pinterest.ca/BetteMakerCreations
Join my Facebook group: https://facebook.com/BettesMakes
Follow me on Instagram: https://Instagram.com/BettesMakes
Subscribe to my YouTube Channel: https://www.youtube.com/c/BettesMakes
Did you like this tutorial? Share it with your friends, pin this image to your favorite board!

8 replies to "How to Use Cricut Infusible Ink to Make a T-Shirt"
Love learning about infusible ink
Gonna try this!!
Great post
Am I the only one who does not loke having designs on t-shirts? I am mostly a paper and cardstock crafter…
Not sure, I do not always like them but most of the time I do –
This is a great tutorial!
This is exactly the thing I want to learn! Thank you!
Have not tried infusible ink yet but very interested.