Are you always in need of a planner divider or pouch but do not want to run to the craft store to buy them?

Planner Pouch and Divider Saves the Day
Planner pouch? Why did I choose this make?
I bought some dividers at the dollar store not long ago and put them through my punch and fit them into my binder. They are OK but they are certainly flimsy and I could not use them as a front cover for my sections. I knew there had to be a better way to have good solid dividers with pouches at my fingertips.
Enter the Planner Pouch and Divider project! Deciding on the shape and any issues was all part of the process as I did not want to get paper cuts each time I put my hand in the pouch. I could not imagine anyone who likes those ugly paper cuts.
I designed this pouch with functionality and minimal risk for paper cuts! The pattern is simple and putting this project together was a cinch! I know you will find it easy as well.
I decided to make 2 different styles! One that uses a standard sized mat and one that used a long mat. I am only going to show you how to use the standard size mat but both templates are available in my resource library.
Here’s what you need to make your Planner Pouch. This post does contain some affiliate links for your convenience (which means if you make a purchase after clicking a link I will earn a small commission but it won’t cost you a penny more)! Read my full disclosure policy.
Quick Links to Information in this Post
Planner Pouch Materials
Planner Pouch Step-by-Step Guide

Step One - Download the Template
For this project you will only need one file - The Planner Pouch
Download the file then upload it to Design Space. If you are not suing Design Space, simply print the PNG version and use it as a template.


Step Two - Design Space Adjustments
As with most projects, there is always something to adjust when you get to Design Space. This project is no different.
First you want to change any black colored objects to a lighter color such as yellow. This you can see all the lines in the project.
SCORE LINES
There are no score lines in the 8.5 x 11" inch rectangle and you will not need to do anything with this part of the project.
The two remaining pieces are the flaps for the pouch.
Each of these shapes will have four inner lines. These lines need to be changed to score lines.
COLOR
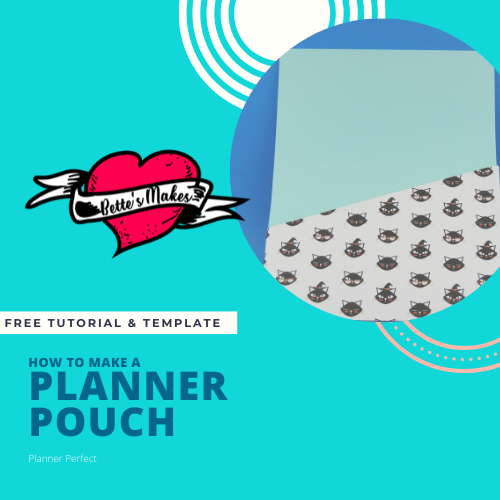
You might want to consider having a different color for the pouches than the large rectangle. The large rectangle is the support piece and the pouches can be cut from designed cardstock. In the example, I used a cat printed pouch (which I absolutely love).
ATTACH
For each of the pouches you will need to attach the four score lines to the pouch itself. This way Cricut will score in the proper place. I usually group my objects together first then attach them.
Once everything is attached, it is time to save the project then click on the MAKE IT button.
MATERIAL
My only suggestion here is that the thicker the material, the more sturdy your divider will be. I do find that medium cardstock is perfect.
If you are using a pattern that goes only in one direction, you should mirror image one of the pieces to make sure all the designs are facing in the right direction.


Step Three - Assembling the Planner Pouch
SCORING
The first item in the project is to fold the score lines to the inside of the pouch for both pieces.
GLUING
First and foremost you want to make sure you do not get any paper cuts from the finished pouch. To do this, I created a fold for the slanted part of the pouch pieces.
Glue down the upper flap onto itself and let dry before gluing the other pieces together.
Next, you will glue the center pieces together. This will be the short edge of the paper. (Here is where you might want to punch the paper with your binder hole punch as the project can get quite thick and may not fit into the punch).
Slide the large rectangle into the pouch on one side with the flaps showing on the top.
Glue the flaps to the rectangle.
Finally, glue the flaps from the upper piece to the flaps on the lower piece to finish off the project.

Step Four - The Finishing Touches
You can add anything you want to the project to beautify it. For me I like to sue the divider for making a title for my section.
You can add the hole punches to your divider so you can add it to your planner.
If you find the project too thick for the hole punch, gently pull it apart at that seam, punch it, then glue it back together.
Show off your new dividers to your friends. Take a photo and share it on Instagram and share this tutorial so they can make their own!
More Craft Ideas from BettesMakes
Here are some amazing crafts you can make from BettesMakes.com
This is just a sampling of the dozens of crafts you can find on my website.
How to Make A Planner Pouch Video
Last Word
I know you are likely like me and always in need of dividers and pouches in my planner. Did you know you can adjust the size to fit the smaller planners? This makes it easy to get a divider anytime you wish!
I made a couple and found some were pretty thick for inserting into my Happy Planner hole punch. All I did was wiggle them loose and punched the pieces separately. It worked like a charm!
I love my cat divider and I think I will make more as I need them.
If you made a divider, please share it on our Facebook group. https://Facebook.com/groups/BettesMakes
Until next time,
Happy Crafting!


Please join me on Pinterest: https://Pinterest.ca/BetteMakerCreations
Join my Facebook group: https://facebook.com/BettesMakes
Follow me on Instagram: https://Instagram.com/BettesMakes
Subscribe to my YouTube Channel: https://www.youtube.com/c/BettesMakes
Don't forget to pin this image to your favorite Pinterest Board